Interviews are opportunities to demonstrate your expertise, and this guide is here to help you shine. Explore the essential Grout and Caulk Application interview questions that employers frequently ask, paired with strategies for crafting responses that set you apart from the competition.
Questions Asked in Grout and Caulk Application Interview
Q 1. What types of grout are best suited for different applications (e.g., interior vs. exterior, wet areas)?
Choosing the right grout depends heavily on the application’s environment. Think of grout like choosing the right paint for a room – you wouldn’t use exterior paint inside, would you?
- Interior Applications (Dry Areas): Standard cement-based grouts are perfectly suitable for most interior walls and floors in dry areas. These are generally cost-effective and readily available. For enhanced stain resistance, consider a sanded grout, especially for larger tile gaps.
- Interior Applications (Wet Areas): For showers, bathrooms, and other wet areas, epoxy grouts are the champions. They are incredibly resistant to moisture, mildew, and stains, far surpassing cement-based options in these conditions. However, they require more specialized mixing and application techniques.
- Exterior Applications: Exterior grout needs to withstand harsh weather conditions – freezing temperatures, UV exposure, and moisture. For these, you’ll want a grout specifically formulated for exterior use. Often these are cement-based but contain additives to enhance durability and weather resistance. Consider the color carefully as prolonged sun exposure can fade some grouts.
For example, I once worked on a high-end bathroom renovation where the client insisted on a specific, light-colored grout. To ensure longevity and prevent staining, we opted for an epoxy grout, despite the higher cost. The result? A stunning bathroom that’s held up perfectly for years.
Q 2. Explain the proper mixing ratios for different grout types.
Grout mixing ratios are crucial for achieving the proper consistency. The instructions are usually printed on the grout packaging, but here’s a general overview:
- Cement-Based Grouts: These typically involve a gradual addition of water to the grout powder, usually a ratio of around 1 part water to 2-3 parts grout powder by weight or volume (check package instructions). Too much water leads to weak, crumbly grout; too little makes it difficult to work with.
- Epoxy Grouts: Epoxy grouts are two-part systems (resin and hardener). The manufacturer provides very precise mixing ratios, usually expressed as a volume ratio (e.g., 1:1 or 2:1). Inaccurate mixing can compromise the grout’s curing, hardness, and resistance. It’s crucial to follow instructions meticulously, using a scale for precise measurements, and thoroughly mixing with a low-speed drill and mixing paddle. Never eyeball it with epoxy grout!
Imagine baking a cake – if you don’t get the ingredient ratios right, you’ll end up with a disaster. It’s the same with grout; precision is paramount.
Q 3. Describe the process of preparing a surface for grout application.
Proper surface preparation is the foundation of a successful grout job. Think of it as prepping your canvas before painting a masterpiece. Here’s the process:
- Clean the Surface Thoroughly: Remove all loose debris, dust, and old grout from the tile joints using a stiff brush and vacuum. You want a clean, dry surface for optimal adhesion.
- Check Tile Levelness: Ensure the tiles are properly seated and level. Any unevenness will show up in the finished grout lines.
- Dampen the Surface (Optional): Lightly dampen the tile surfaces, especially with absorbent tiles like ceramic. This prevents the grout from drying out too quickly and allows for better adhesion.
- Protect Surrounding Surfaces: Cover any areas you don’t want grout to get on (e.g., countertops, vanities) with painter’s tape and plastic sheeting.
One time, I neglected to thoroughly clean the tile joints before applying grout. The result? The grout didn’t fully adhere, and it started chipping away in weeks. Lesson learned: never rush the prep work!
Q 4. What tools are necessary for efficient and professional grout application?
The right tools make all the difference. Think of it as having the right set of brushes for painting; you wouldn’t use a house brush for detailed work.
- Grout Float: This is your primary tool for applying the grout into the joints.
- Rubber Grout Float: A specialized float to create smooth, even grout lines.
- Grout Sponge: Used for cleaning excess grout from the tile surfaces.
- Bucket: For mixing the grout.
- Mixing Paddle (for power mixing): A crucial tool for thoroughly blending epoxy grouts.
- Measuring Cups/Scales: Especially important for precise epoxy grout mixing.
- Putty Knife or Scraper: To remove excess grout.
- Safety Gloves and Eye Protection: Always use appropriate personal protective equipment.
Q 5. How do you ensure proper grout consistency and workability?
Achieving the right grout consistency is key to a professional finish. Think of it like making pancake batter – you need it to be thick enough to hold its shape but thin enough to spread easily.
For cement-based grouts, the consistency should be like peanut butter – thick enough to stay in the joints but not so stiff that it won’t spread smoothly. If it’s too watery, it will shrink and crack. If it’s too dry, it will be difficult to work with and will result in uneven joints. For epoxy grouts, consistency depends on the specific manufacturer’s instructions, but it’s typically thicker than cement-based grout. Improper consistency often leads to uneven grout lines, air pockets, and poor adhesion.
Q 6. What are the common problems encountered during grout application, and how do you address them?
Common problems include:
- Cracking: Often caused by improper mixing, shrinkage, or movement in the substrate.
- Uneven Grout Lines: Caused by inconsistent application or inadequate tool use.
- Efflorescence (white powdery deposits): Results from moisture rising to the surface and bringing salts with it.
- Staining: Especially prevalent with cement-based grouts in wet areas.
- Poor Adhesion: Caused by insufficient surface preparation or the use of inappropriate grout for the application.
Solutions: Address these issues proactively. Ensure proper mixing, adequate curing time, suitable grout selection for the application, meticulous surface preparation, and using a sealant to protect against moisture and stains. For efflorescence, cleaning with a specialized cleaner is often necessary.
Q 7. How do you clean excess grout from tile surfaces?
Cleaning excess grout is crucial for a polished finish. Imagine trying to paint a picture and leaving streaks of paint everywhere! Here’s how:
- Wait for the grout to set slightly: Don’t start cleaning while it’s too wet, or you’ll remove it from the joints.
- Use a damp sponge: Gently wipe the surface to remove excess grout. Rinse the sponge frequently in clean water to avoid smearing.
- Avoid excessive pressure: Pressing too hard can damage the grout or the tiles.
- Use a grout sponge specifically designed for cleaning grout: These have textured surfaces that aid in removing excess grout without scratching tiles.
- Use a grout haze remover (if needed): For stubborn grout residue, a specialized haze remover is recommended.
Regular cleaning is essential, particularly in wet areas, to maintain the grout’s integrity and cleanliness.
Q 8. Explain the importance of grout sealing and how it’s performed.
Grout sealing is crucial for maintaining the longevity and aesthetic appeal of tiled surfaces. Unsealed grout is porous, making it susceptible to water damage, staining, mold, and mildew growth. Sealing acts as a protective barrier, preventing these issues and simplifying cleaning.
The process involves applying a grout sealer to the cleaned and completely dry grout lines. First, thoroughly clean the grout using a grout brush and appropriate cleaner to remove dirt and debris. Allow it to dry completely, typically 24-48 hours. Then, apply the sealer evenly using a sponge applicator, brush, or sprayer, following the manufacturer’s instructions. Let the sealer penetrate the grout for the recommended time before wiping away any excess. Two coats are often recommended for optimal protection. Remember, proper ventilation is essential during application.
Q 9. What are the different types of caulk available, and what are their applications?
Caulk comes in various types, each designed for specific applications:
- Silicone Caulk: Highly durable, water-resistant, and paintable. Excellent for bathrooms, kitchens, and exterior applications where moisture is a concern. Comes in different formulations like acetic acid (vinegar-smelling), neutral cure (low odor), and kitchen and bath.
- Acrylic Caulk: Less expensive and easier to clean up than silicone, but less durable and water-resistant. Suitable for interior projects with low moisture exposure, like trim work or minor gaps.
- Latex Caulk: Paintable and flexible, ideal for interior applications where movement is expected, such as around windows and doors. Generally not suitable for areas with high moisture.
- Butyl Caulk: Excellent for sealing against air and moisture. Often used for roofing and exterior applications where strong adhesion and weather resistance are needed. It’s harder to work with than other caulks.
The choice of caulk depends entirely on the project requirements. For instance, silicone caulk is the preferred choice for shower surrounds due to its superior water resistance, while acrylic caulk may suffice for baseboard gaps.
Q 10. How do you choose the appropriate caulk for different materials (e.g., wood, tile, metal)?
Material compatibility is key when selecting caulk. Using the wrong type can lead to failure and require costly repairs.
- Wood: Acrylic or latex caulk generally work well for wood, providing flexibility to accommodate wood movement.
- Tile: Silicone caulk is ideal for tile, particularly in wet areas, due to its superior water resistance and durability.
- Metal: Silicone or butyl caulk are often used for metal due to their strong adhesion and ability to withstand expansion and contraction.
Always check the manufacturer’s instructions to confirm compatibility. For example, certain silicone caulks might not adhere well to some plastics.
Q 11. Describe the proper techniques for applying caulk to achieve a smooth, professional finish.
Achieving a smooth, professional caulk finish requires attention to detail and the right techniques.
- Prepare the Surface: Ensure the surface is clean, dry, and free of dust or debris. Use a primer if necessary.
- Apply the Caulk: Cut the caulk tube at a 45-degree angle for a clean bead. Apply a continuous bead, keeping the nozzle at a consistent distance and pressure from the surface.
- Smooth the Caulk: Immediately after application, use a wet finger, caulk smoother, or a similar tool to create a smooth, consistent finish. This step is crucial for professional results. Wipe away any excess caulk immediately.
- Clean Up: Clean up any excess caulk with a damp cloth or appropriate solvent before it cures.
Practice makes perfect. Start with a less visible area to refine your technique before tackling prominent areas.
Q 12. How do you prepare a surface for caulk application?
Surface preparation is the foundation of successful caulk application. Proper prep guarantees good adhesion and a long-lasting seal.
- Clean the Surface: Remove all loose debris, dust, dirt, and old caulk residue. Use a wire brush, scraper, or putty knife, as needed. For greasy or oily surfaces, use a degreaser.
- Dry the Surface: Allow the surface to dry completely before applying caulk. Moisture interferes with adhesion.
- Prime if Necessary: Some surfaces, particularly porous ones, may benefit from a primer to improve adhesion. Follow the primer manufacturer’s instructions.
A well-prepared surface dramatically improves the caulk’s bonding and longevity.
Q 13. What tools are needed for efficient and neat caulk application?
The right tools are essential for efficient and neat caulk application:
- Caulk Gun: To dispense the caulk evenly.
- Caulk Smoother/Tool: To create a smooth, finished bead.
- Utility Knife or Razor Blade: To cut the caulk tube nozzle at a 45-degree angle.
- Damp Cloth or Sponge: To clean up excess caulk immediately.
- Putty Knife or Scraper: To remove old caulk and prepare the surface.
- Primer (if needed): To improve adhesion to certain surfaces.
Investing in quality tools ensures better results and a more professional finish.
Q 14. How do you prevent caulk from sagging or shrinking?
Sagging and shrinking are common caulk problems, often caused by improper application or using the wrong type of caulk.
- Apply Thin Beads: Avoid applying overly thick beads, especially in vertical applications.
- Use the Right Caulk: Choose a caulk appropriate for the application and environmental conditions. For example, choose a low-sag formulation for vertical surfaces.
- Apply in Moderate Temperatures: Extreme temperatures can affect caulk performance, so avoid application in direct sunlight or freezing temperatures.
- Support Large Beads: For particularly large gaps, consider using backer rod to reduce the amount of caulk needed and prevent sagging.
By following these steps and selecting the right caulk, you can minimize the risk of sagging and shrinking and achieve a professional-looking finish.
Q 15. Explain the importance of proper tooling and smoothing techniques for caulk.
Proper tooling and smoothing techniques are crucial for achieving a professional, long-lasting, and aesthetically pleasing caulk application. Think of it like icing a cake – the right tools and techniques make all the difference between a messy, amateur job and a beautifully finished product.
The right tools include a high-quality caulking gun, a variety of smoothing tools (e.g., a wet finger, a caulking tool, or a damp sponge), and painter’s tape for clean lines. Improper tools can lead to uneven application, gaps, or a messy finish.
Smoothing techniques involve immediately after application, using your chosen tool to create a smooth, seamless bead. For example, using a wet finger helps to create a concave profile which is less likely to crack over time compared to a rounded bead. Pressing firmly but gently, work the caulk into the joint, ensuring full contact. Excess material should be removed promptly, before it skins over.
Different caulking materials require slightly different techniques. For example, silicone caulk, due to its elasticity, can benefit from a more thorough smoothing process to ensure a flawless finish.
Career Expert Tips:
- Ace those interviews! Prepare effectively by reviewing the Top 50 Most Common Interview Questions on ResumeGemini.
- Navigate your job search with confidence! Explore a wide range of Career Tips on ResumeGemini. Learn about common challenges and recommendations to overcome them.
- Craft the perfect resume! Master the Art of Resume Writing with ResumeGemini’s guide. Showcase your unique qualifications and achievements effectively.
- Don’t miss out on holiday savings! Build your dream resume with ResumeGemini’s ATS optimized templates.
Q 16. What are the signs of failing grout or caulk?
Failing grout or caulk shows itself in several ways, and the signs often depend on the underlying cause. Think of it like checking your car for wear and tear – several indications point towards potential problems.
- Cracking or crumbling: This is a major sign of grout failure, often appearing as small hairline cracks that can grow larger over time. It indicates loss of structural integrity.
- Discoloration: Mold and mildew growth is a common culprit, causing discoloration. This can indicate moisture intrusion behind the tiles or caulk lines, which should be addressed immediately to prevent further damage.
- Shrinking or pulling away from the surface: This shows that the sealant has lost its adhesion, leading to gaps that allow water ingress.
- Soft or spongy texture: If you can press your finger into the grout and it leaves an indentation, the grout is likely compromised and will need to be replaced.
- Water staining: Dark streaks or stains around the grout or caulk indicate water infiltration, a common trigger for grout deterioration.
These signs often indicate that water has penetrated the protective barrier, leading to deterioration. Addressing these issues promptly can prevent costly repairs down the line.
Q 17. How do you repair damaged grout or caulk?
Repairing damaged grout or caulk involves careful removal of the old material and proper reapplication. Think of it as a surgical procedure – precision is key to avoid causing further damage.
- Preparation: Start by cleaning the area thoroughly. Use a grout saw or utility knife to carefully remove the damaged grout or caulk. Make sure to remove all loose or crumbling material to create a clean surface for the new material.
- Cleaning: Thoroughly clean the area using a suitable cleaner to remove dust, debris, and any existing mold or mildew. Allow ample drying time before proceeding.
- Application: Apply the new grout or caulk using the appropriate tools, taking care to fill the joint completely. Use a smoothing tool to create a neat and even finish. Again, this is where the right tooling is crucial. A wet finger, a rubber smoothing tool or even a grout float can be ideal, depending on the material.
- Cleaning: Once the grout or caulk has set slightly (check the manufacturer’s instructions), clean the excess material immediately using a damp sponge or cloth to avoid staining. Excessive force can dislodge the freshly applied material.
- Protection: Allow the new grout or caulk to cure completely before exposing the area to excessive moisture or heavy use. This curing time varies depending on the type of material used, so read the manufacturer’s instructions carefully.
Q 18. What safety precautions should be taken when working with grout and caulk?
Safety is paramount when working with grout and caulk. Always treat these materials with respect to minimize risks of accidents and health problems.
- Ventilation: Ensure adequate ventilation to avoid inhaling dust or fumes. Work in a well-ventilated area, or wear a respirator if needed.
- Eye Protection: Wear safety glasses to protect your eyes from flying debris or splashes.
- Gloves: Wear appropriate gloves to protect your hands from irritants and chemicals. Latex or nitrile gloves are commonly recommended.
- Skin Protection: Cover exposed skin as much as possible to minimize skin contact. Grout and caulk can be irritating to some people’s skin.
- Disposal: Properly dispose of leftover materials according to local regulations. Do not pour grout or caulk down the drain.
- Read Labels: Always carefully read and follow the manufacturer’s safety instructions on the packaging.
Remember that safety measures are not optional – they are crucial for your well-being and prevent accidental exposure to harmful chemicals or injuries.
Q 19. Describe your experience with different grout colors and finishes.
My experience with grout colors and finishes spans a wide range. I’ve worked with everything from classic off-whites and warm grays to bolder colors like deep blues and even custom-mixed shades to match specific design schemes. Each color creates a vastly different aesthetic. Think of the grout as the frame of your tile artwork – it greatly impacts the overall look.
Finishes also play a crucial role. I’ve worked with sanded grout (which provides a more textured surface, ideal for wider grout lines) and unsanded grout (suitable for narrow grout lines and glass or polished tiles). Choosing the right finish impacts the overall durability and cleanability. A matte finish is less prone to staining than a glossy one, while a glossy finish can brighten a space and make it feel more luxurious.
One project involved using a custom-mixed grout color to match a client’s unique, antique-style tiles. It required meticulous color matching and multiple test mixes to ensure a seamless, cohesive look. The final result was stunning and a testament to the importance of color and finish selection.
Q 20. How do you match existing grout or caulk colors?
Matching existing grout or caulk colors can be tricky, but with the right approach, it’s achievable. It’s important to remember that lighting conditions can change the perception of color.
The first step is to collect a small sample of the existing grout or caulk. Take your sample to a home improvement store that specializes in color matching. Often they can match the color precisely. If this isn’t possible, compare the sample to color charts offered by the grout or caulk manufacturers.
Take into account natural light changes when selecting a match, taking a sample during the time of day the area is typically viewed. Test the match in an inconspicuous area first to ensure it blends seamlessly before committing to the entire project. Sometimes, a slightly lighter shade can help avoid noticeable differences.
Q 21. What is the difference between epoxy grout and cement-based grout?
Epoxy grout and cement-based grout are the two most common types, each with its own strengths and weaknesses. Think of it like choosing between two different types of paint for a project – each serves a different purpose.
- Cement-based grout: This is the more traditional and less expensive option. It’s porous, meaning it can absorb water, making it more susceptible to staining and mold growth. However, it’s easier to work with and clean up than epoxy grout.
- Epoxy grout: This is a more durable and water-resistant option. It’s non-porous, making it highly resistant to staining and mold. It’s also stronger and more suitable for high-traffic areas or wet environments such as showers and swimming pools. However, it is more expensive and more difficult to work with, requiring faster work due to its quicker setting time. It also usually requires special cleaning solvents.
The best choice depends on the specific application. For showers and other high-moisture areas, epoxy grout is preferred for its superior water resistance and durability. For less demanding applications, cement-based grout is often a cost-effective alternative.
Q 22. How do you handle challenging grout lines, such as narrow or irregular spaces?
Narrow or irregular grout lines present a unique challenge, requiring precision and the right tools. Think of it like trying to fill a tiny, oddly shaped crevice – you need the right instrument for the job. For extremely narrow lines, I utilize a grout bag or a specially designed grout pen, which allows for very controlled application. These tools help prevent excess grout from spilling onto the surrounding tiles. For irregular spaces, I often use a combination of techniques. I might start with a grout bag to fill the majority of the space, and then use a small pointed tool, such as a grout float or even a toothpick, to carefully fill any remaining gaps and ensure even distribution. Always remember to wipe away excess grout immediately to avoid staining the tiles. I often use a damp sponge and work at a 45-degree angle to minimize the chance of smudging or smearing. This meticulous approach guarantees a professional, long-lasting finish, even on the trickiest grout lines.
Q 23. What is your experience with using different caulking guns?
My experience with caulking guns spans a variety of models, from basic manual guns to pneumatic and battery-powered options. Each type has its strengths and weaknesses. The manual gun is great for smaller projects, offering excellent control, particularly for precise caulking applications. However, it can be tiring on larger jobs. Pneumatic guns, on the other hand, offer significantly greater speed and are ideal for large commercial projects. The power makes quick work of extensive caulking. I’ve also worked with battery-powered guns which offer a nice balance between control and speed, eliminating the need for an air compressor. The key to successful caulk application, regardless of the gun type, is consistent pressure and a smooth, continuous bead. I always make sure to select the correct nozzle for the desired bead size and surface type. For example, a smaller nozzle is needed for thinner joints, whereas a larger nozzle is better suited for thicker ones. The proper tool selection directly impacts the overall appearance and durability of the caulk.
Q 24. How do you clean and maintain your grout and caulk application tools?
Maintaining clean tools is crucial for efficient and professional grout and caulk application. It prevents cross-contamination of materials and ensures consistent results. Immediately after each use, I thoroughly clean my tools. For grout tools, this typically involves removing excess grout with a damp sponge and then washing them with soapy water. For caulk guns, I use a solvent or caulk remover appropriate for the type of caulk used. The nozzle needs to be carefully cleaned to remove any hardened caulk, preventing clogs in future uses. I always let the tools dry completely before storage to prevent rust or damage. This preventative cleaning saves time and money in the long run as it significantly extends the life of the tools and minimizes the risk of damaging projects by using old, unclean tools.
Q 25. Have you worked with any specialized grout or caulk products?
Yes, I’ve worked with several specialized grout and caulk products. For instance, I’ve used epoxy grouts for high-moisture areas like showers, where their superior water resistance is essential for long-term durability. These grouts are more challenging to work with, requiring precise mixing and fast application. Another example includes using flexible caulk for areas prone to movement, such as exterior corners or joints between different materials. This type of caulk accommodates expansion and contraction, preventing cracking and leaks. I’ve also used anti-microbial grouts in areas requiring exceptional sanitation, like hospitals or food preparation facilities. Understanding the properties of various specialized products is vital in selecting the appropriate material for a given application, ensuring optimal performance and longevity.
Q 26. Describe your experience working in different environments (e.g., residential, commercial)?
My experience encompasses both residential and commercial projects. Residential projects often involve detailed work and require a keen eye for aesthetics. I’ve worked on everything from small bathroom renovations to larger-scale kitchen backsplash installations. The focus here is precision and meeting the client’s specific design preferences. Commercial projects, on the other hand, often involve larger areas and tighter deadlines. For example, I’ve worked on tiling projects in shopping malls and office buildings, requiring efficient techniques and team coordination to finish the work on time and within budget. Adapting my approach to the specific demands of each environment is essential for successful project completion, regardless of scale or setting.
Q 27. How do you estimate the amount of grout or caulk needed for a project?
Accurately estimating grout and caulk is crucial for preventing material waste and delays. I typically begin by meticulously measuring the project area. For grout, I calculate the total linear footage of grout lines and multiply by the average width and depth to determine the cubic volume needed. Then I refer to the manufacturer’s specifications on the packaging to determine how much grout is needed per cubic unit. For caulk, I estimate the total linear footage of caulk lines and multiply by the desired bead width and depth. This approach allows me to add a small safety margin to account for waste or unforeseen issues. Having a good understanding of the manufacturer’s coverage rates from prior experiences ensures a highly accurate estimation. Accurate estimations prevent material waste and maintain budget control.
Q 28. What is your approach to troubleshooting problems during grout or caulk application?
Troubleshooting is an inherent part of this profession. If I encounter a problem like cracking caulk, I’ll investigate the cause—perhaps insufficient surface preparation or using an inappropriate type of caulk. If grout is not setting properly, I’ll check the mixing ratio and environmental conditions (temperature and humidity). For uneven grout lines, I’ll refine my technique, using smaller tools and paying more attention to detail. A systematic approach focusing on the underlying cause—whether material, environmental, or technique related—is key to resolving the issue. Documenting the process and solutions is a helpful practice for future projects and provides a useful resource to analyze any trends and improve processes.
Key Topics to Learn for Grout and Caulk Application Interview
- Material Selection: Understanding different types of grout and caulk (epoxy, cement-based, silicone, etc.), their properties, and appropriate applications for various surfaces and environments.
- Surface Preparation: Proper cleaning, priming, and repairing of surfaces before grout and caulk application to ensure adhesion and longevity.
- Application Techniques: Mastering the correct tools and methods for applying grout and caulk, including using tools like caulk guns, grout floats, and sponges for achieving professional-looking results.
- Joint Preparation: Creating consistent and properly sized joints for optimal grout and caulk performance and aesthetic appeal. Understanding different joint types and their applications.
- Finishing and Cleaning: Techniques for cleaning excess grout and caulk, achieving smooth finishes, and protecting the applied materials from damage.
- Troubleshooting Common Issues: Identifying and resolving problems such as cracking, shrinkage, staining, and poor adhesion during and after the application process.
- Safety Procedures and Regulations: Understanding and adhering to relevant safety protocols, including personal protective equipment (PPE) use and handling of potentially hazardous materials.
- Project Estimation and Time Management: Accurately estimating material quantities, labor costs, and project timelines for efficient and profitable work.
Next Steps
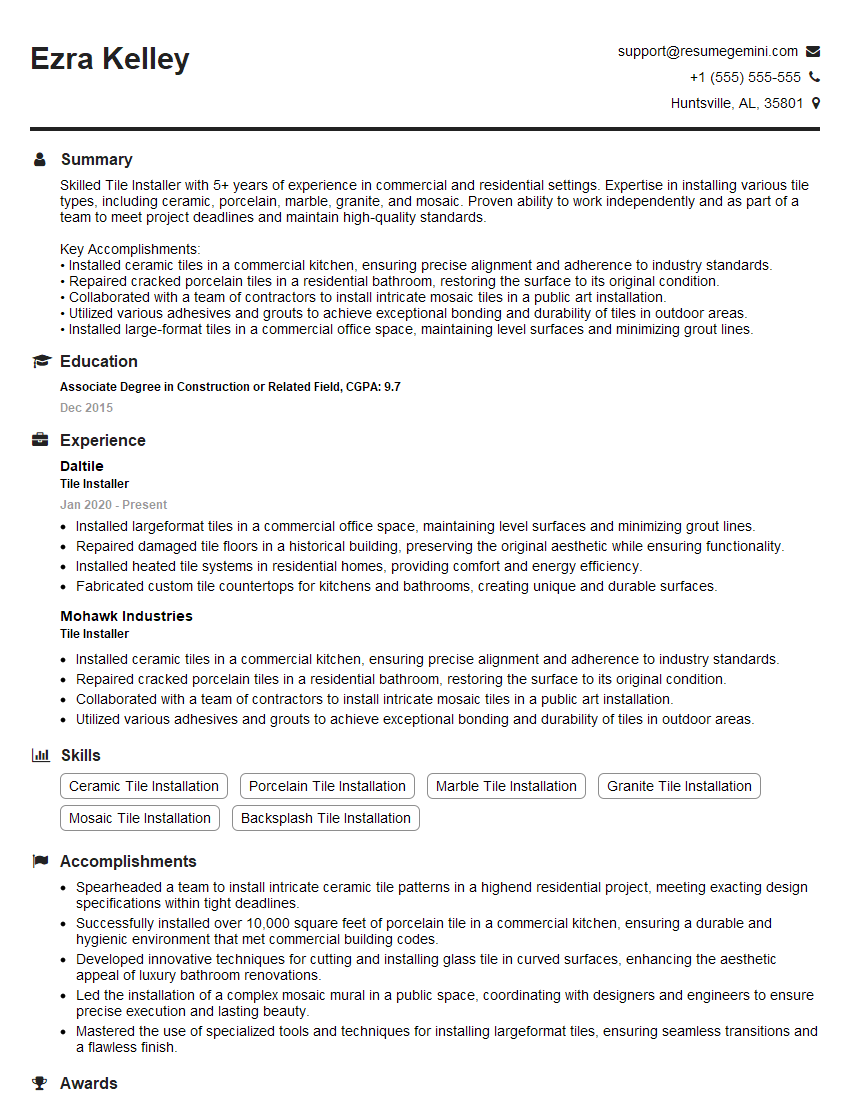
Mastering grout and caulk application opens doors to diverse and rewarding opportunities in the construction and renovation industries. A strong understanding of these techniques demonstrates your practical skills and attention to detail, making you a valuable asset to any team. To increase your chances of landing your dream job, create a compelling, ATS-friendly resume that highlights your expertise. ResumeGemini is a trusted resource to help you build a professional resume that showcases your abilities effectively. ResumeGemini provides examples of resumes tailored to Grout and Caulk Application, guiding you to create a document that captures the attention of potential employers.
Explore more articles
Users Rating of Our Blogs
Share Your Experience
We value your feedback! Please rate our content and share your thoughts (optional).
What Readers Say About Our Blog
Interesting Article, I liked the depth of knowledge you’ve shared.
Helpful, thanks for sharing.
Hi, I represent a social media marketing agency and liked your blog
Hi, I represent an SEO company that specialises in getting you AI citations and higher rankings on Google. I’d like to offer you a 100% free SEO audit for your website. Would you be interested?
