The thought of an interview can be nerve-wracking, but the right preparation can make all the difference. Explore this comprehensive guide to Microphone Placement and Optimization interview questions and gain the confidence you need to showcase your abilities and secure the role.
Questions Asked in Microphone Placement and Optimization Interview
Q 1. Explain the proximity effect and how it impacts microphone choice and placement.
The proximity effect is a bass boost that occurs when a sound source is very close to a directional microphone, typically a cardioid or supercardioid microphone. It’s caused by the microphone’s diaphragm responding more to the sound pressure waves at lower frequencies, effectively emphasizing the bass frequencies as you move closer.
This effect significantly impacts microphone choice and placement. For instance, if you want a warm, full sound, the proximity effect can be beneficial, particularly for vocals where a richer bass is often desired. In this case, you might choose a cardioid mic and place it relatively close to the sound source, perhaps 6 to 12 inches away. However, if you need a neutral, flat frequency response, you might opt for an omnidirectional microphone or place the microphone further away from the source to minimize the bass boost. Conversely, excessive proximity effect can lead to a muddy, boomy sound, particularly in situations where you are recording instruments that already have a strong low-frequency presence.
Consider the recording of a bass guitar: Placing a cardioid microphone close to the amp will enhance the low-end frequencies through the proximity effect. However, in the same setting, a large diaphragm condenser placed further away might give a more controlled and less boomy sound. The choice is dependent upon the desired sound and is made through careful consideration of the proximity effect.
Q 2. Describe the differences between cardioid, omnidirectional, and hypercardioid microphone polar patterns.
Microphone polar patterns describe the microphone’s sensitivity to sound from different directions. Think of it as a microphone’s ‘hearing range’.
- Omnidirectional: These microphones pick up sound equally from all directions. They’re great for capturing ambience, but less ideal when you want to isolate a specific sound source because they pick up everything around them. Imagine a perfectly round bubble representing the microphone’s sensitivity; sound from any direction within the bubble will be equally captured.
- Cardioid: These microphones are highly sensitive to sound from the front and relatively insensitive to sound from the rear. They’re the most common type used in recording and live sound because they offer a good balance of isolation and capturing a wide enough sound area from the front. Their pattern resembles a heart shape, hence the name ‘cardioid’. The sensitivity of a cardioid mic gradually reduces as you move from the front to the back.
- Hypercardioid: These are even more directional than cardioid microphones, with a very narrow pickup pattern at the front and increased sensitivity to the rear than a cardioid mic. Their increased sensitivity and directionality mean they provide a higher degree of sound rejection, but because of their narrower pickup pattern, precise microphone placement is crucial. Think of this like having a very focused spotlight – only what’s directly in front is highlighted.
Choosing the right polar pattern depends heavily on the recording situation. A live band recording might benefit from cardioid mics on the instruments to minimize bleed, whereas an ambience recording might use an omnidirectional mic. A hypercardioid would be preferred for very controlled recording environments such as a voice over situation.
Q 3. How do you determine the optimal distance between a microphone and a sound source?
Determining the optimal microphone-to-sound-source distance is crucial for achieving the desired sound quality. There’s no single ‘perfect’ distance, as it depends heavily on the microphone type, the sound source, and the desired sonic characteristics.
Generally, closer distances can enhance bass frequencies (proximity effect) but might also introduce harshness or sibilance. Further distances can provide a more natural and balanced sound but might reduce signal level, thus requiring more gain, and also increase the risk of capturing unwanted room noise.
A good starting point is to experiment within a range. For vocals, start around 6 to 12 inches, listening carefully for any unwanted effects. For acoustic instruments, the optimal distance can vary widely. Experiment with distances ranging from 1 foot to several feet, paying close attention to the balance of direct sound versus room ambience. Always monitor your levels closely, adjusting the gain as needed to maintain a healthy signal-to-noise ratio. The overall goal is to find a balance between capturing a strong, clear signal while minimizing unwanted artifacts.
Q 4. Explain the concept of off-axis coloration and how to mitigate it.
Off-axis coloration refers to the change in sound color or frequency response when a sound source is not positioned directly in front of the microphone. Directional microphones, especially cardioids and hypercardioids, are most susceptible. Sound hitting the microphone from an angle will often result in a less balanced and sometimes undesirable tonal quality.
Mitigation strategies include:
- Careful Microphone Placement: Position the sound source directly in front of the microphone to minimize off-axis coloration. This is often the simplest and most effective approach.
- Using Omnidirectional Mics (If Applicable): Omnidirectional mics are less sensitive to off-axis coloration. However, this comes at the expense of capturing more background noise.
- Microphone Choice: Some microphones are designed with better off-axis response than others. Researching microphone specifications and reviewing reviews can aid in finding mics with good off-axis characteristics.
- EQ and Post-Production: While it’s best to handle coloration during recording, you can subtly adjust the frequency balance in post-production to compensate for some off-axis coloration. However, this is a less ideal solution as it can’t completely fix the issue.
For example, in recording a drum kit, aiming the microphone directly at the snare drum is critical to prevent coloration from other drums or cymbals affecting the snare sound.
Q 5. What techniques do you use to minimize background noise during recording?
Minimizing background noise during recording is vital for achieving high-quality audio. My techniques involve a multi-pronged approach:
- Room Treatment: Treating the recording space with acoustic panels and bass traps significantly reduces unwanted reflections and reverberation, thereby reducing background noise. Consider setting up your recording space in a quiet environment.
- Careful Microphone Choice: Choosing a microphone with good noise rejection capabilities is crucial. A cardioid or hypercardioid microphone will be much more effective than an omnidirectional microphone in rejecting ambient noise.
- Microphone Placement: Position the microphone as close as possible to the sound source to minimize the amount of background noise relative to the desired sound. This also minimizes the pickup of unwanted room reflections.
- Sound Source Isolation: If possible, isolate the sound source from noisy surroundings. For instance, placing screens between the recording area and a source of noise such as a computer fan.
- Gate: Using a noise gate in post-production can help attenuate background noise by lowering the audio level when a certain threshold is not met. This is useful for sections of audio that have moments of silence.
In practice, I start with room treatment to establish a quiet foundation and then focus on microphone choice, placement, and sound source isolation to further minimize any unwanted background noise.
Q 6. How do you handle microphone bleed during multi-track recording?
Microphone bleed, where the sound from one source is picked up by another microphone intended to record a different source, is a common problem in multi-track recording. The solution is to carefully manage how much sound each microphone picks up.
- Microphone Placement and Polar Patterns: Strategic microphone placement using cardioid or hypercardioid microphones reduces bleed. Pointing the microphones directly at their target source and strategically positioning the sources and microphones reduces spill. For example, you would minimize snare bleed into an overhead mic by positioning the snare off axis to that overhead.
- Isolation: Physically isolating sound sources using screens, gobos, or strategically placed objects can effectively reduce bleed. Using baffles or dividers is a very effective technique.
- EQ and Post-Production: While not ideal, targeted EQ adjustments can reduce bleed in post-production by attenuating frequencies where bleed is most prominent, but it’s never as effective as careful planning during recording.
- Careful Gain Staging: Minimizing the gain on microphones that are prone to picking up bleed minimizes the level of any bleed at the point of recording.
For instance, during a drum recording, using cardioid mics on close mics, and strategic placement of overhead mics, with careful adjustment of levels and gain staging, are all utilized to reduce bleed significantly. The use of screens between the mics further aids this.
Q 7. Describe your experience with different types of microphone suspensions and shock mounts.
I have extensive experience with various microphone suspensions and shock mounts. These are essential for isolating microphones from vibrations that can introduce unwanted noise into the recording.
- Elastic Suspensions: These use elastic cords or bands to isolate the microphone, effectively damping vibrations from the floor or stand. They are versatile and often affordable but can sometimes add a degree of low-frequency rumble if not set up properly. They are extremely effective at isolating small mechanical vibrations.
- Shock Mounts: These use a system of dampeners or springs to isolate the microphone, preventing vibrations from transferring through the stand. They’re particularly effective at handling heavier microphones and are very effective for dealing with vibrations transmitted up a mic stand from the floor. Different types and models cater to different weight classes of microphones.
- Rycote Lyre Mounts: These innovative mounts use a specially designed lyre-shaped suspension system, offering excellent isolation and stability. These are renowned for their excellent isolation and extremely low frequency response, and they are quite effective at handling a wider variety of mechanical vibrations.
The choice of suspension depends on the recording environment and the type of microphone. For instance, delicate condenser microphones in a quiet studio might only need a basic elastic suspension, while a dynamic microphone in a noisy environment might benefit from a robust shock mount. I always assess the environment and the microphone’s needs before selecting a suspension system. Improper mounting will dramatically affect recording quality. In one instance, I used a Rycote Lyre mount for recording a particularly sensitive acoustic guitar in a rehearsal room, and it made all the difference in reducing unwanted vibrations and getting a clean recording.
Q 8. How do you choose the right microphone for a specific recording environment?
Choosing the right microphone hinges on understanding the recording environment and the desired sound. Consider these factors:
- Sound Source: Is it a quiet acoustic guitar, a loud drum kit, or a spoken-word performance? Different microphones excel at capturing different sound sources. A condenser microphone is ideal for capturing delicate nuances of an acoustic instrument, while a dynamic microphone is better suited for the high sound pressure levels of a drum kit because of its robust construction and ability to handle high SPLs without distortion.
- Environment: Is it a quiet studio, a busy street, or a large concert hall? A highly sensitive condenser microphone might pick up unwanted background noise in a noisy environment, whereas a cardioid dynamic microphone will largely reject background noise and only focus on sounds directly in front of it.
- Polar Pattern: Cardioid, omni-directional, figure-8 – each polar pattern affects how the microphone picks up sound from different directions. A cardioid microphone, for instance, is commonly used for vocals and instruments as it rejects off-axis sounds. An omni-directional microphone would be a good choice for capturing ambience or a room’s sound.
- Frequency Response: Some microphones are designed to emphasize certain frequencies. A microphone with a boosted presence range might be excellent for vocals, while one with a flatter response is suitable for recording instruments for mixing and mastering.
For example, I once worked on a project recording a string quartet in a small, untreated room. We chose high-quality large-diaphragm condenser microphones due to their sensitivity and ability to capture the subtle nuances of the strings. However, we also had to account for the room’s reflections, which led to applying digital room correction and equalization techniques after recording.
Q 9. Explain your understanding of acoustic treatment and its impact on microphone placement.
Acoustic treatment is crucial for optimizing microphone placement and sound quality. It involves modifying a space’s acoustics to minimize unwanted reflections, echoes, and standing waves. This minimizes unwanted noise and improves clarity, resulting in a more accurate and natural recording.
- Absorption: Acoustic panels, bass traps, and carpets absorb sound energy, reducing reflections and reverberation. The amount of absorption needed depends on the size and characteristics of the room.
- Diffusion: Diffusers scatter sound waves, preventing focused reflections that could cause coloration or muddiness. This distributes energy evenly across the room, making the sound more natural and less “boxy”.
- Isolation: Isolation booths or strategically placed barriers block external noise, preventing unwanted sounds from entering the recording. This is particularly relevant in noisy environments.
Imagine recording vocals in a room with bare walls. The sound would bounce around, creating echoes and a muddy sound. By strategically placing acoustic panels to absorb reflections and using bass traps in corners to manage low-frequency build-up, we greatly improve the clarity of the vocals recorded. The result is a cleaner, clearer recording that is easier to mix.
Q 10. How do you troubleshoot feedback issues during a live sound reinforcement event?
Feedback is a howling or screeching sound caused by a microphone picking up its own amplified output. Troubleshooting involves a systematic approach:
- Reduce Gain: Lowering the gain on the microphone preamp is often the simplest solution. Start by reducing the gain significantly and gradually increase it until feedback is about to occur; this is the limit of your gain before feedback.
- Adjust Microphone Placement: Move the microphone slightly away from the speaker, or angle it to minimize direct sound path between speaker and microphone. Even small adjustments can make a big difference. The most efficient way is to find the null point of the microphone’s polar pattern.
- EQ the offending frequencies: A graphic equalizer (EQ) can help cut specific frequencies causing feedback. Gradually cut the frequencies to find the offending ones, often around the mid-range. If you are using multiple mics, this strategy will be necessary.
- Use Feedback Suppressors: These devices automatically detect and reduce feedback. They are highly effective in live situations and reduce the need for continuous adjustments by the sound engineer.
- Check speaker positioning: Ensure speakers are not pointed directly at microphones. In live sound, audience participation may result in unpredictable results.
I remember a live show where we experienced sudden feedback. Quickly, we lowered the gain, moved a vocal microphone slightly, and used a parametric EQ to notch out a specific frequency causing the problem. The show continued without further issues.
Q 11. What are the considerations for microphone placement in a reverberant space?
Reverberant spaces present challenges for microphone placement because sound reflections can mask the direct sound, making the recording muddy or unclear. Strategies to mitigate this include:
- Proximity Effect: Place the microphone as close to the sound source as possible to maximize the ratio of direct sound to reflected sound (especially for dynamic mics). This helps avoid capturing too much room ambience.
- Directional Microphones: Use cardioid or hypercardioid microphones to minimize the pickup of rear sounds. These microphones have a tighter pickup pattern, focusing primarily on sounds directly in front of them.
- Microphone Isolation: Use microphone windscreens or shock mounts to isolate the microphone from external vibrations and reduce the pickup of room ambience.
- Strategic Placement: Experiment with placement in areas with minimal reflections; corners often create a build-up of low-frequency reflections, and so placement away from corners is essential for good recordings.
- Acoustic Treatment (if possible): Even if you are not recording in a professional studio, adding even some acoustic treatment can make an impact.
In a large, reverberant hall, I once had to record a solo piano performance. By positioning the microphone close to the piano’s soundboard and using a cardioid condenser microphone, we significantly reduced the impact of reverberation, capturing a more balanced and detailed sound. This was further improved by using the high-pass filter built into the audio interface to remove low-frequency room rumble.
Q 12. Describe your experience with using a parabolic microphone.
A parabolic microphone is a highly directional microphone used for capturing distant sounds. It uses a parabolic reflector to focus sound waves onto a small microphone capsule, providing exceptional directionality and gain before feedback.
My experience with parabolic microphones includes wildlife recording, where their ability to pick up subtle sounds from far away is invaluable. They allow you to capture audio of animals without disturbing their natural behavior. However, their size and sensitivity to wind require careful handling and may require additional wind protection.
One challenge with parabolic microphones is their sensitivity to wind noise. Wind can create significant interference, requiring the use of windshields and careful environmental considerations to minimize interference.
Q 13. Explain how to manage phase cancellation when using multiple microphones.
Phase cancellation occurs when two sound waves arrive at a microphone out of sync, causing destructive interference and reducing the overall volume or even completely cancelling the sound. Managing this involves:
- Careful Microphone Placement: Position microphones symmetrically and at an equal distance from the sound source. This helps maintain consistent arrival time of sound waves.
- 3:1 Rule: Maintain a distance of at least three times the distance between microphones to avoid phase issues. This ensures the sound waves reaching each microphone are sufficiently different.
- Phase Coherence: Use microphones with similar frequency responses to maintain consistent signal timing across all the microphones.
- Stereo Technique: Use techniques such as coincident pair (XY) or spaced pair (AB) to mitigate phasing issues, employing different microphone orientations to minimize interference.
- Post-Production Techniques: Phase correction plugins can be used in post-production to minimize the effects of phasing, however, it is crucial to capture the audio in a way that minimizes the need for post-processing.
In a stereo recording of a choir, I once encountered phase cancellation issues by improperly placing the microphones. By applying the 3:1 rule and carefully adjusting their positions, we eliminated the phasing problems, resulting in a much clearer and more natural stereo image.
Q 14. How do you handle comb filtering issues during microphone placement?
Comb filtering is a type of phase cancellation that occurs when multiple microphones are capturing the same sound, creating notches or dips in the frequency response. These dips create an unnatural, hollow, or comb-like sound.
- Minimize Multiple Microphone Pickup: Use the minimum number of microphones required for the recording. In some cases, a single microphone may be sufficient; this can dramatically reduce the risk of comb filtering.
- Different Microphone Positions: If multiple microphones are necessary, ensure they are sufficiently spaced or directed at slightly different positions to reduce the instances where they capture overlapping waveforms.
- EQ: Use a graphic equalizer (EQ) to subtly adjust the overall frequency response and attempt to smooth out any dips or notches in the frequency spectrum.
- Careful Mixing: In the mixing stage, adjust the levels of each microphone channel to reduce or eliminate noticeable comb filtering effects.
During a recording session, we encountered comb filtering when using two microphones close together to capture a single instrument. By strategically moving one of the microphones slightly and adjusting their levels during the mix, we minimized the comb filtering, improving the overall tonal balance.
Q 15. What are some common microphone placement techniques for dialogue recording?
Microphone placement for dialogue is crucial for clear, natural-sounding audio. The goal is to capture the voice while minimizing unwanted room reflections and background noise. Common techniques include:
- Cardioid Pattern and Proximity Effect: Placing a cardioid microphone close to the speaker’s mouth (typically 6-12 inches) utilizes the proximity effect, boosting low frequencies for a warmer, fuller sound. This also helps reduce background noise pickup.
- XY Stereo Technique: Using two matched cardioid microphones angled at 90 degrees captures a wider soundstage, ideal for interviews or scenes requiring more ambience. They should be placed close to the sound source.
- Mid-Side (MS) Stereo Technique: This technique uses a cardioid microphone (Mid) for the main signal and a bidirectional microphone (Side) to capture the ambience. Combining these signals in post-production creates a wider, more immersive stereo image. It’s often used in situations requiring greater control over ambience.
- Off-Axis Placement (for natural ambience): Sometimes, slightly off-axis placement can capture a more natural sound, particularly when capturing more of the room’s natural reverb. This should be used cautiously and with careful consideration of the room’s acoustic properties.
The best technique depends on the specific recording environment and desired audio character. For example, a busy environment might call for tighter placement, while a quiet studio recording might allow for a bit more flexibility.
Career Expert Tips:
- Ace those interviews! Prepare effectively by reviewing the Top 50 Most Common Interview Questions on ResumeGemini.
- Navigate your job search with confidence! Explore a wide range of Career Tips on ResumeGemini. Learn about common challenges and recommendations to overcome them.
- Craft the perfect resume! Master the Art of Resume Writing with ResumeGemini’s guide. Showcase your unique qualifications and achievements effectively.
- Don’t miss out on holiday savings! Build your dream resume with ResumeGemini’s ATS optimized templates.
Q 16. Describe your experience with different types of microphone preamps.
My experience spans a wide range of microphone preamps, from classic tube preamps to modern solid-state designs. I’ve worked extensively with Neve, API, Universal Audio, and Focusrite preamps, each offering unique sonic characteristics. Tube preamps are known for their warmth and harmonic richness, often preferred for vocals and instruments needing a vintage character. However, they can be more prone to noise and require careful gain staging. Solid-state preamps offer clarity, transparency, and generally lower noise, making them suitable for a wide range of applications, from detailed instrument recording to clean dialogue capture.
Choosing the right preamp involves considering the microphone’s output level and impedance. For instance, a low-output ribbon microphone needs a higher-gain preamp with low noise to prevent signal degradation. I carefully A/B different preamps during recording sessions to select the best match for the source and desired tonal quality. Proper gain staging, which I’ll elaborate on later, is always paramount regardless of the preamp choice.
Q 17. What software or tools do you use for microphone signal processing?
My workflow involves a suite of software and tools for microphone signal processing. I primarily use digital audio workstations (DAWs) like Pro Tools and Logic Pro X for recording, editing, and mixing. These DAWs provide extensive plugins for equalization (EQ), compression, de-essing, and noise reduction. I often utilize plugins from Waves, Universal Audio, and iZotope for advanced processing tasks.
For precise spectral analysis, I employ software like Spek or iZotope RX to identify and address specific frequency issues. Additionally, I utilize metering plugins for monitoring levels and preventing clipping. Real-time spectral analyzers integrated within my DAW help me make informed EQ decisions while recording.
Q 18. How do you manage gain staging to prevent distortion during recording?
Gain staging is crucial for preventing distortion and achieving optimal audio quality. It’s the process of managing signal levels at each stage of the audio chain – from the microphone to the analog-to-digital converter (ADC) in the interface. The goal is to achieve a strong signal without ever pushing the levels into the clipping range.
My approach involves:
- Starting Low: I begin with the gain on the preamp set relatively low and gradually increase it while monitoring the input levels carefully. I aim for a peak level around -18dBFS (decibels relative to full scale) for digital recording, leaving headroom to avoid clipping.
- Monitoring Carefully: I use metering plugins within my DAW to monitor both peak and average levels. I carefully watch for any signs of clipping or distortion.
- Adjusting as Needed: Depending on the source, I adjust the gain until I have a strong signal with sufficient headroom. I often fine-tune during recording to account for variations in vocal levels or instrument dynamics.
- Using Compression: After recording, I might use compression to control dynamic range and reduce the difference between loud and quiet sections. This does not replace good gain staging, but acts as a secondary means of controlling dynamics.
Proper gain staging is fundamental for a clean, dynamic recording that can withstand further processing during mixing and mastering.
Q 19. Explain your understanding of microphone polar pattern selection for different applications.
Microphone polar patterns determine the microphone’s sensitivity to sound from different directions. Understanding these patterns is essential for controlling sound capture and reducing unwanted noise.
- Cardioid: Heart-shaped pattern; most sensitive to sound from the front, rejecting sound from the rear. Ideal for vocals, instruments, and dialogue recording, reducing background noise.
- Hypercardioid: More directional than cardioid; excellent for rejecting background noise but more susceptible to proximity effect. Used in live sound reinforcement or when extreme rejection of rear sound is necessary.
- Supercardioid: Between cardioid and hypercardioid in directivity, offering a balance between noise rejection and proximity effect. Often used in broadcast applications or field recording.
- Omnidirectional: Equally sensitive to sound from all directions; great for capturing ambience or a natural sound field. However, this also picks up a lot of background noise, making it less useful for isolating sound sources.
- Bidirectional (Figure-8): Sensitive to sound from the front and rear, rejecting sound from the sides. Commonly used in mid-side stereo recording or for specific applications requiring this directional characteristic.
The choice of polar pattern depends heavily on the application. For example, an omnidirectional mic is good for recording a large ensemble in a controlled environment, while a hypercardioid mic is best for live vocals where there is excessive background noise to reject.
Q 20. What are some techniques to minimize handling noise when recording?
Minimizing handling noise requires a multi-faceted approach. It’s important to use techniques that reduce physical vibrations from transferring to the microphone capsule.
- Shock Mounts: These isolate the microphone from the stand, effectively reducing vibrations caused by bumps or movements. A well-designed shock mount is essential for minimizing handling noise, particularly for sensitive microphones.
- Microphone Suspension Systems: These provide even more isolation compared to standard shock mounts, particularly useful for delicate situations or instruments prone to vibrations. They are essential for studio recording where even slight vibrations are undesirable.
- Careful Handling: It’s important to handle microphones gently and avoid abrupt movements or jarring impacts. Soft touches are key! Practicing careful handling is the simplest and most effective way to begin.
- Pre-processing: In post-processing, noise reduction plugins can help to attenuate remaining handling noise; however, this is a secondary strategy and is only effective when other measures have already been implemented.
- Proper Boom Technique: When using a boom pole for microphone placement, proper technique involves using slow and smooth movements, anticipating potential vibrations, and maintaining a firm grip.
Combining these techniques minimizes the need for extensive noise reduction in post-production, resulting in a cleaner and more natural-sounding recording.
Q 21. Describe your experience with wireless microphones and their potential issues.
My experience with wireless microphones is extensive, encompassing various applications from live events to film production. Wireless mics offer significant advantages in mobility and flexibility, but they also present potential issues.
- Interference: Wireless signals can be susceptible to interference from other electronic devices operating on the same frequency. This can manifest as dropouts, static, or distorted audio. Careful frequency coordination and proper antenna placement are crucial to mitigate this.
- Latency: Wireless systems introduce a slight delay between the audio source and the receiver. While usually negligible, it can become problematic in critical applications such as lip-sync for film or video. It’s crucial to test the system and understand the latency level before critical recording.
- Signal Strength: Signal strength can vary depending on distance, obstacles, and environmental conditions. Proper antenna placement and sufficient transmitter power are crucial to ensure a strong, consistent signal. Regular signal strength monitoring is vital.
- Battery Life: Battery life is a critical factor to consider; using high-quality rechargeable batteries and having backup batteries available is essential to prevent interruption during recording or performance.
- RF Management: In high-density RF environments such as large concerts or festivals, meticulous RF management is essential to avoid signal interference and collisions. Coordinating with other wireless systems is key to avoid signal issues.
Despite these challenges, wireless microphones remain an indispensable tool in many recording scenarios. Proper planning, careful equipment selection, and thorough testing are vital to minimize potential problems and ensure reliable performance.
Q 22. How do you achieve a balanced stereo image when using multiple microphones?
Achieving a balanced stereo image with multiple microphones hinges on understanding microphone techniques and spatial relationships. The most common approach is using a spaced pair technique, often with cardioid or hypercardioid microphones. This involves placing two microphones a certain distance apart, typically between 2-10 feet depending on the sound source’s width.
The ideal distance creates a natural stereo width, where each microphone captures a slightly different perspective of the sound source. Imagine listening to an orchestra; you hear instruments in different places in your listening space, not all mixed into a single point. This same spatial information is what we strive to capture. The further apart the microphones, the wider the stereo image, but too far apart and you risk phase cancellation issues (where the signals from each microphone interfere destructively).
For a more precise control, a coincident pair technique is used, where two microphones are placed very close together, often at a specific angle. This provides a more intimate and less wide stereo image. This works great for close miking instruments or vocals.
Ultimately, the best approach depends on the sound source and the desired effect. Careful listening and adjustments are key to finding the ‘sweet spot’ for a perfectly balanced stereo image.
Q 23. How do you assess the quality of a microphone recording?
Assessing microphone recording quality involves several key aspects. Firstly, we evaluate the frequency response – how accurately the microphone captures the full range of audible frequencies (from low bass to high treble). A good recording will have a flat frequency response, without boosting or cutting any frequencies unnecessarily. I check for any muddiness (lack of clarity in lower frequencies) or harshness (excessive high frequencies).
Next, I look at the signal-to-noise ratio (SNR). This refers to the balance between the desired audio signal and unwanted background noise. A high SNR indicates a clean recording with minimal noise. Noise can manifest as hiss, hum, or rumble. I listen carefully to eliminate unwanted noises.
Dynamic range is another critical factor; it’s the difference between the quietest and loudest parts of the recording. A wider dynamic range allows for more detail and nuance. If it’s too compressed, the recording loses depth.
Finally, I check for artifacts like distortion, clipping, or phase cancellation problems. Distortion results from overloading the microphone input, while clipping severely limits dynamic range. Phase cancellation creates a thin or hollow sound caused by interference between sound waves captured by multiple microphones.
Q 24. Describe the challenges of microphone placement in outdoor environments.
Outdoor microphone placement presents unique challenges compared to indoor settings. The biggest hurdle is dealing with uncontrolled ambient noise. Wind, traffic, birds, and other environmental sounds can severely degrade recording quality. Wind noise is particularly problematic; it can create a whooshing or swishing sound, completely masking your desired audio. I usually use windshields or blimps to mitigate that.
Reverberation and reflections are also a major concern outdoors. Sounds bounce off surfaces like buildings, trees, and the ground, creating echoes and reducing clarity. Choosing a recording location with minimal reflective surfaces is crucial. A location with natural sound-absorbing surfaces is ideal, like a forest or area with dense vegetation.
Distance control is more complex. Sound propagation outdoors is influenced by the weather, temperature, and humidity – which influences the speed of sound, and the way it is absorbed or reflected. In addition, the sound will be constantly changing, so keeping consistency is difficult. Careful planning and monitoring are essential to achieve a high-quality outdoor recording.
Q 25. How do you test microphone sensitivity and frequency response?
Testing microphone sensitivity and frequency response requires specialized equipment. For sensitivity, we use a sound level meter (SLM) and a calibrated sound source, often a tone generator. By placing the SLM at a known distance from the sound source and measuring the output of the microphone, we can determine its sensitivity in terms of voltage output per unit of sound pressure level (SPL). We measure the SPL with and without the microphone to account for the background noise.
Testing frequency response involves using a sine wave sweep generator. This generates a signal that covers the entire audible frequency range. The microphone’s output is analyzed using a spectrum analyzer, generating a plot showing the microphone’s output at each frequency. An ideal microphone would show a flat response across the entire frequency range, but slight variations are common.
These measurements will help us ascertain if the microphone performs as intended. If the tests fail, a calibration is needed to compensate for deviations from the ideal.
Q 26. Explain your understanding of the inverse square law in the context of microphone placement.
The inverse square law dictates that sound intensity decreases proportionally to the square of the distance from the source. In simpler terms, if you double the distance between a sound source and a microphone, the sound intensity at the microphone will decrease by a factor of four. This is crucial for microphone placement because it directly affects the sound’s level and relative strength to ambient noise.
For example, if you’re recording a singer, positioning the microphone closer will make the vocals significantly louder than background instruments or room noise. Conversely, moving the microphone further away reduces the vocal level relative to the ambient noise. We use this principle to control the balance between the desired sounds and unwanted noise. Understanding the inverse square law is vital for achieving a balanced and well-recorded mix. It’s not merely about loudness; it is how the sounds will mix and relate in the recording.
Q 27. What techniques do you employ to control ambient noise during recordings?
Controlling ambient noise is a crucial aspect of professional recording. The primary techniques involve careful selection of the recording environment, using sound-absorbing materials, and employing signal processing. Choosing a quieter location is the most effective first step. This is where the skill in selecting recording environments comes into play.
Sound-absorbing materials like acoustic foam panels and blankets can dampen reflections and reduce reverberation. We can effectively reduce unwanted sounds using carefully placed absorption in strategic locations. The goal is to make the environment as ‘dead’ as possible, minimizing unwanted reflections or echoes.
Signal processing techniques, such as noise gates and noise reduction plugins in digital audio workstations (DAWs), can be applied post-recording to further reduce unwanted sounds. Noise gates automatically mute the signal when it falls below a set threshold. Noise reduction plugins analyze the audio and remove noise without significantly affecting the desired sounds.
Q 28. Describe your experience with using boundary microphones.
Boundary microphones, also known as pressure zone microphones, are designed to be mounted directly on a surface, such as a table or floor. They are highly versatile and frequently used in conferencing systems, video production, and other scenarios where a low-profile and omni-directional pickup is desired. Their omnidirectional characteristic gives them a 360° pickup pattern.
My experience includes using boundary mics in various applications, most notably for recording meetings or conference calls. They offer several advantages: they’re easy to set up, they require minimal adjustment, and their cardioid characteristic is effective even in reverberant environments. The sound quality can be excellent if placed appropriately. I usually prefer boundary microphones when a highly uniform pickup pattern is needed.
However, there are limitations. The sound character can be colored by the surface material the microphone is mounted on; placing the microphone on a soft surface can result in a more muffled sound. It also picks up vibrations from the surface itself, therefore requiring careful placement and selection of the mounting surface to ensure good recordings.
Key Topics to Learn for Microphone Placement and Optimization Interview
- Microphone Types and Characteristics: Understanding the differences between dynamic, condenser, and ribbon microphones, and their suitability for various applications (e.g., voiceovers, podcasting, live sound).
- Polar Patterns and Their Impact: Mastering cardioid, omnidirectional, and bidirectional patterns; knowing how to choose the right pattern for optimal sound capture and minimizing unwanted noise.
- Proximity Effect and its Management: Understanding the bass boost caused by close miking and techniques to control it for balanced sound.
- Acoustic Treatment and Room Considerations: Identifying and mitigating common acoustic problems like reflections, reverberation, and standing waves that affect microphone performance. Practical applications of acoustic treatments like diffusers and absorbers.
- Practical Microphone Placement Techniques: Applying theoretical knowledge to real-world scenarios. For example, proper placement for voice recording, instrument miking, and avoiding feedback.
- Troubleshooting Common Issues: Identifying and resolving problems like hum, buzz, noise, and distortion. Developing problem-solving skills to diagnose and fix microphone issues.
- Signal Flow and Gain Staging: Understanding the signal path from microphone to recording device, proper gain staging to prevent clipping and achieve optimal signal-to-noise ratio.
- Digital Signal Processing (DSP) and its Role: Familiarity with basic DSP techniques used for microphone signal processing such as EQ, compression, and noise reduction.
Next Steps
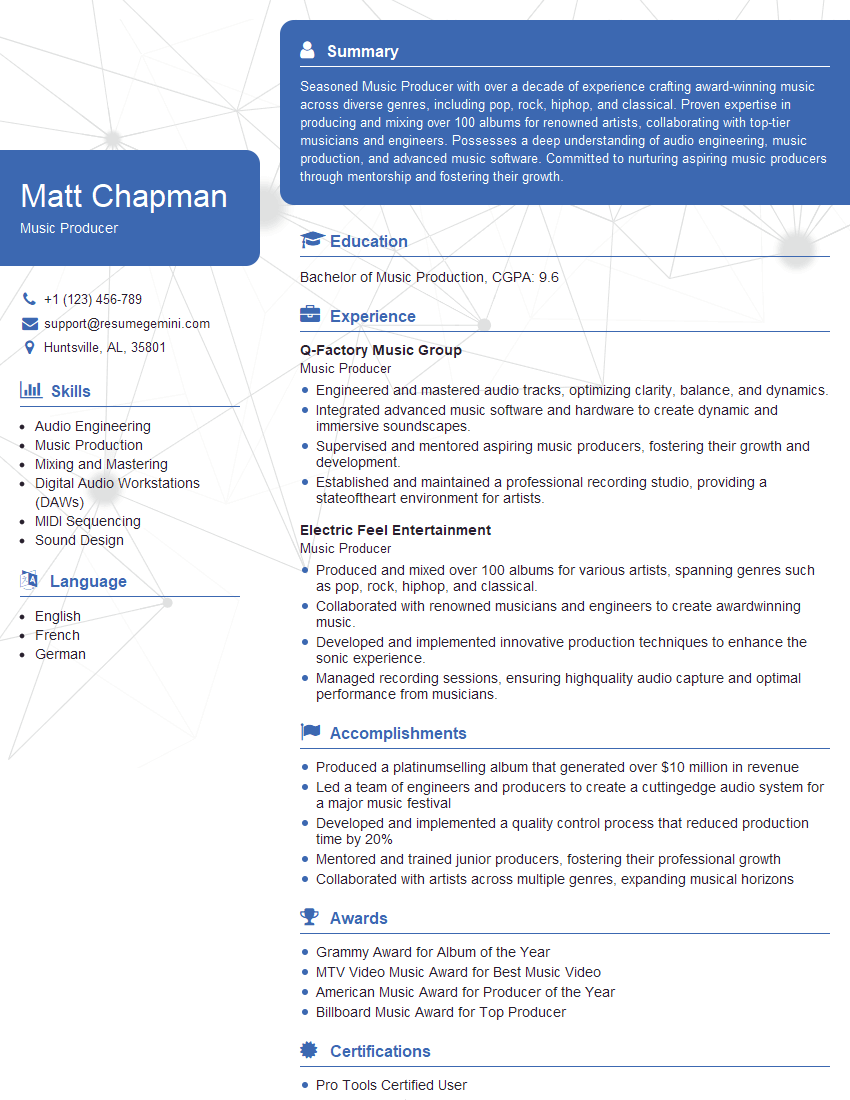
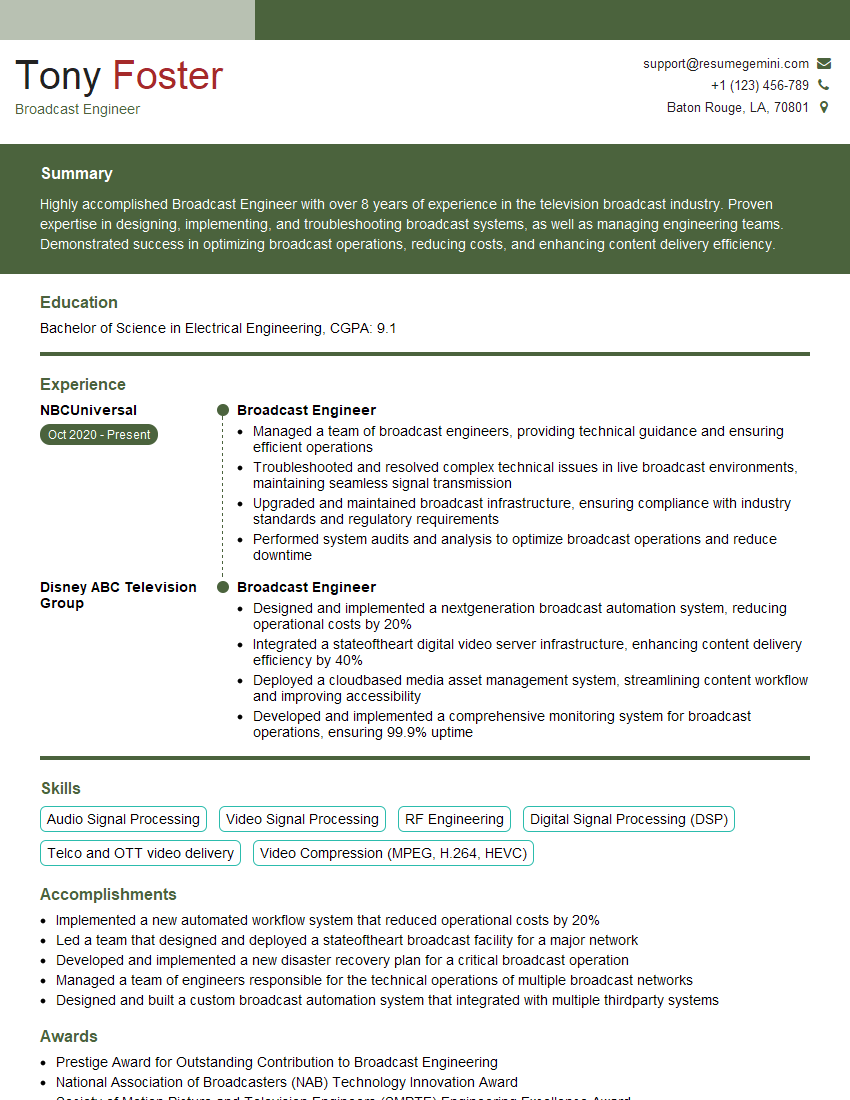
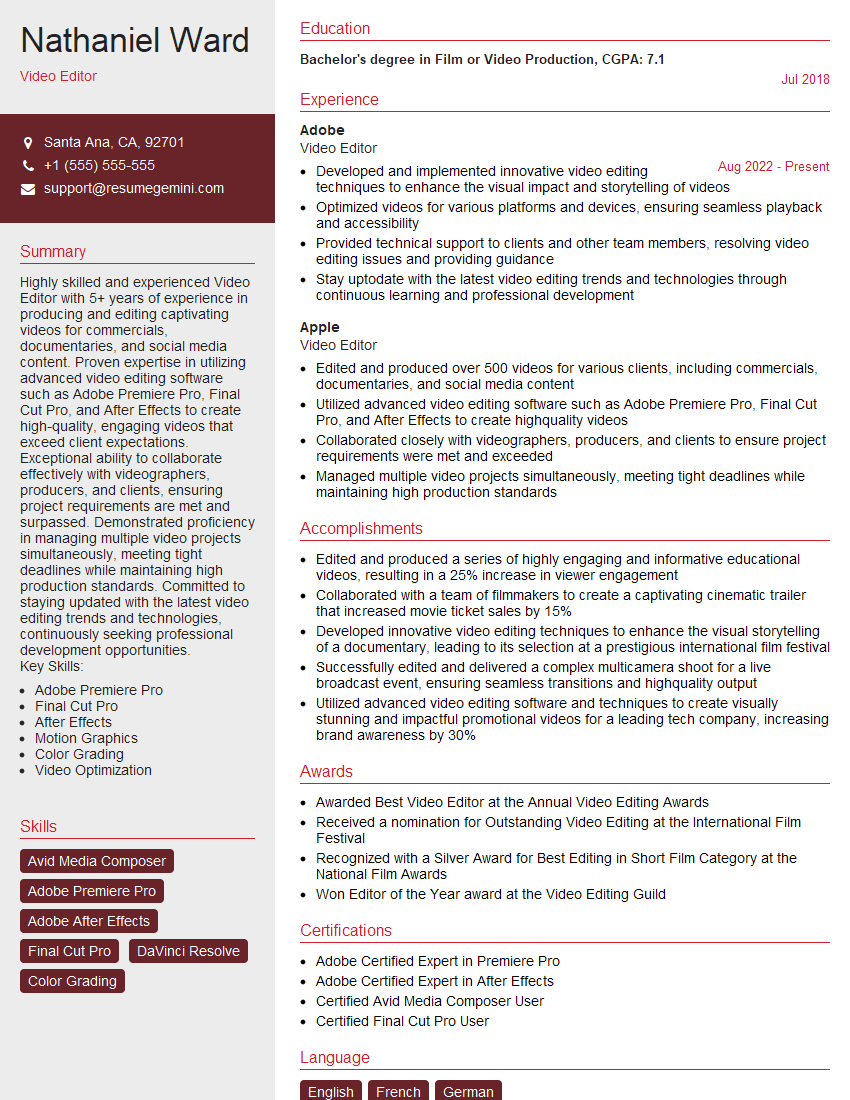
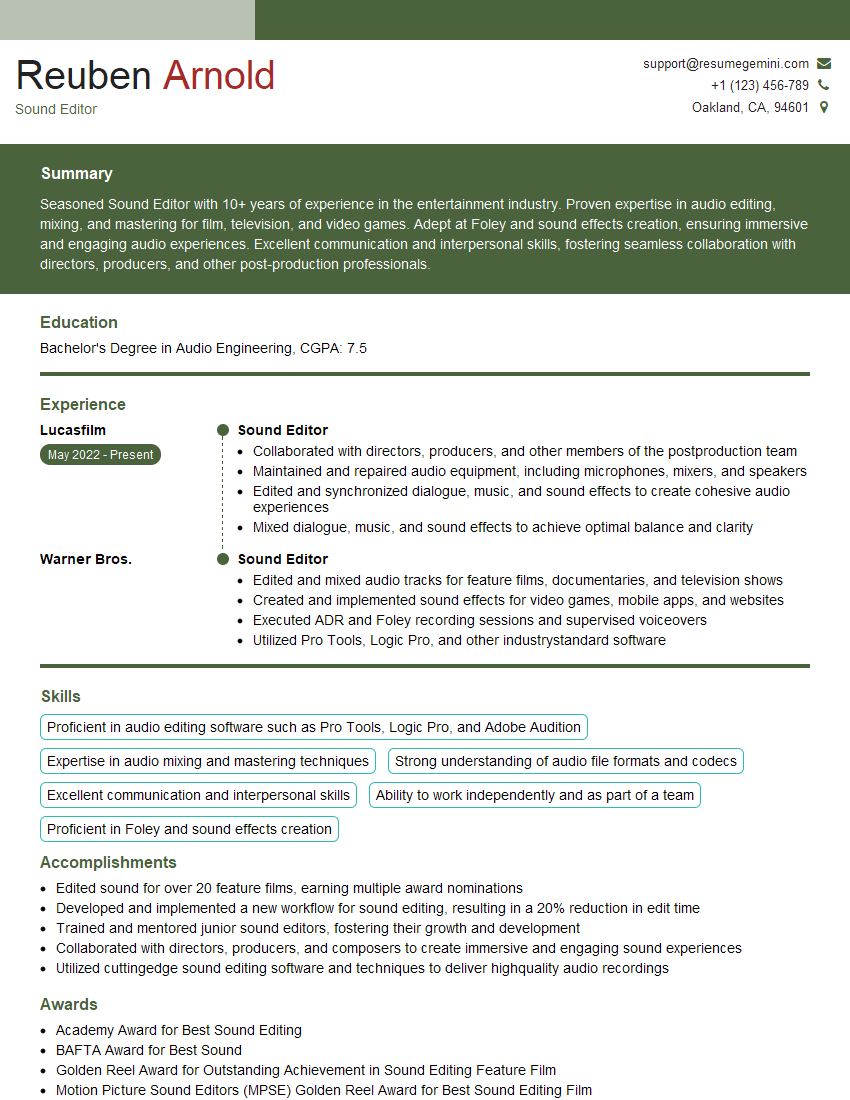
Mastering microphone placement and optimization is crucial for success in audio-related fields, opening doors to exciting career opportunities and higher earning potential. A well-crafted resume is your key to unlocking these prospects. Make sure your resume is ATS-friendly to maximize its visibility to potential employers. ResumeGemini is a trusted resource to help you build a professional and effective resume that showcases your skills and experience. Examples of resumes tailored to Microphone Placement and Optimization are available to help guide you. Take the next step in your career journey – build a winning resume today!
Explore more articles
Users Rating of Our Blogs
Share Your Experience
We value your feedback! Please rate our content and share your thoughts (optional).
What Readers Say About Our Blog
Live Rent Free!
https://bit.ly/LiveRentFREE
Interesting Article, I liked the depth of knowledge you’ve shared.
Helpful, thanks for sharing.
Hi, I represent a social media marketing agency and liked your blog
Hi, I represent an SEO company that specialises in getting you AI citations and higher rankings on Google. I’d like to offer you a 100% free SEO audit for your website. Would you be interested?


