The thought of an interview can be nerve-wracking, but the right preparation can make all the difference. Explore this comprehensive guide to Valve and Piping System Maintenance interview questions and gain the confidence you need to showcase your abilities and secure the role.
Questions Asked in Valve and Piping System Maintenance Interview
Q 1. Explain the different types of valves and their applications.
Valves are essential components in piping systems, controlling the flow of fluids. They come in various types, each suited for specific applications. Here are some key examples:
- Gate Valves: These are on/off valves, best for fully open or fully closed positions. Think of them like a gate blocking or allowing flow. They’re ideal for large-diameter pipelines where frequent on/off operation isn’t required because they’re not efficient for throttling.
- Globe Valves: Used for regulating flow, these valves use a disc to control flow by partially obstructing the pathway. Imagine a partially opened door controlling the flow of people. They’re great for throttling and controlling pressure but are less efficient than gate valves for fully open flow.
- Ball Valves: These valves use a rotating ball with a hole to control flow. They’re simple, quick-acting on/off valves, perfect for applications requiring fast shut-off, like emergency shutdowns. Think of flipping a light switch; it’s either on or off.
- Butterfly Valves: Similar to ball valves in their quick operation, these use a rotating disc to control flow. They are ideal for large-diameter pipelines needing rapid on/off control, often used in HVAC systems or water treatment plants. They are also excellent for throttling, but less precise than globe valves.
- Check Valves: These valves automatically prevent backflow. They’re like one-way doors in a piping system, ensuring fluid flows in only one direction. Common in pump systems to protect against reverse flow.
The choice of valve depends on factors such as fluid properties, pressure, temperature, required flow control, and frequency of operation. For instance, a high-pressure steam line might require a robust gate valve, while a delicate process control loop might use a globe valve.
Q 2. Describe the process of valve packing gland adjustment.
Adjusting a valve packing gland is crucial for preventing leaks around the valve stem. It involves tightening the gland packing to create a seal, but over-tightening can damage the stem. Here’s a step-by-step process:
- Inspect the gland: Check the condition of the packing and gland nuts. Look for any signs of damage or wear.
- Loosen the gland nuts slightly: This allows the packing to compress less tightly and ease the stem’s movement, reducing friction.
- Lightly tighten the gland nuts: Gradually tighten the nuts in small increments, ensuring even tightening around the circumference. Don’t over-tighten! This is a crucial step to prevent damage.
- Test for leaks: Operate the valve to check for leaks. If leaks persist, repeat steps 2 and 3, taking care not to over-tighten. If leaks continue despite adjustments, the packing may need replacing.
- Lubricate (if needed): Certain packings benefit from lubrication for better sealing and easier operation.
Important Note: Always refer to the valve manufacturer’s instructions for specific gland adjustment procedures. Incorrect adjustment can lead to valve damage or leaks. Consider using a torque wrench for consistent tightening.
Q 3. What are the common causes of valve leakage and how are they addressed?
Valve leakage can stem from various issues. Identifying the cause is key to effective repair. Some common causes include:
- Worn or damaged packing: This is the most common cause, resulting from age, wear, or chemical attack. Replacing the packing usually resolves the issue.
- Damaged valve stem: Scratches, corrosion, or misalignment can create leakage paths. Repair or replacement of the stem might be necessary.
- Valve seat damage: Erosion, corrosion, or damage to the seating surfaces can cause leakage. Resurfacing or replacing the seat may be needed.
- Incorrect gland adjustment: Over-tightening can damage the packing or stem, while under-tightening allows leaks. Proper adjustment, as described earlier, is vital.
- Improper installation: Faulty installation, misalignment, or damage during installation can lead to leakage. Careful installation and adherence to guidelines are necessary.
Addressing these issues involves identifying the root cause through inspection. For example, if the packing is worn, it needs replacement. If the stem is damaged, it must be repaired or replaced. Sometimes, a simple adjustment is enough to solve the problem. A thorough inspection and proper repair procedure are crucial to prevent further damage and ensure proper operation.
Q 4. How do you perform a pressure test on a piping system?
Pressure testing a piping system is a crucial safety and quality control step. It verifies the system’s integrity and identifies potential leaks before operation. The process usually involves these steps:
- Isolate the system: Completely isolate the section of the piping system to be tested from the rest of the system using appropriate valves.
- Prepare the system: Ensure all connections are tight and secure. Inspect for any visible damage or defects.
- Apply pressure: Use a pressure pump or compressed air to gradually increase the pressure to the specified test pressure. The test pressure is usually higher than the system’s operating pressure to account for safety margins.
- Monitor pressure: Continuously monitor the pressure for any drops, indicating a leak. Use a pressure gauge for accurate readings.
- Inspect for leaks: Carefully inspect all joints, welds, and connections for any signs of leaks using leak detection solution or by observation.
- Document results: Record the test pressure, duration, and any observed leaks. This documentation provides evidence of the system’s integrity.
Safety is paramount during pressure testing. Always ensure proper safety procedures are followed, including using appropriate personal protective equipment (PPE) and having trained personnel conduct the test. The test pressure and duration should comply with relevant codes and standards.
Q 5. Explain the different types of pipe fittings and their uses.
Pipe fittings connect and direct pipes, modifying the flow path. Several types are commonly used:
- Elbows: Change the direction of the pipe flow. They come in various angles, the most common being 45 and 90 degrees.
- Tees: Allow for branching of the pipe flow, creating a three-way connection.
- Reducers: Connect pipes of different diameters, reducing the flow area.
- Couplings: Join two pipes of the same diameter.
- Unions: Disconnectable couplings allowing for easy pipe separation for maintenance or repair.
- Caps: Close the end of a pipe.
- Flanges: Provide a mounting surface for valves and other components, typically used for high-pressure applications. They allow for easy disassembly for maintenance and are often used with gaskets for sealing.
The choice of fitting depends on the application’s requirements, including pressure, temperature, material compatibility, and the need for easy disconnection. For example, high-pressure systems might use flanged fittings, while lower pressure systems may use threaded fittings. Correct fitting selection is crucial for system integrity and safety.
Q 6. What are the safety precautions for working with high-pressure piping systems?
Working with high-pressure piping systems demands strict adherence to safety precautions. Neglecting these precautions can lead to serious injury or even fatality. Key safety measures include:
- Lockout/Tagout Procedures: Always use proper lockout/tagout procedures before working on any part of the system. This ensures that the system is completely isolated and prevents accidental energization.
- Personal Protective Equipment (PPE): Always wear appropriate PPE, including safety glasses, gloves, and hearing protection. For high-pressure systems, specialized protective clothing may be necessary.
- Pressure Relief Devices: Ensure that pressure relief valves are functioning correctly to prevent over-pressurization.
- Regular Inspections: Regularly inspect the system for leaks, corrosion, and other damage. Early detection of problems prevents accidents.
- Trained Personnel: Only trained and qualified personnel should work on high-pressure systems.
- Emergency Procedures: Establish and communicate clear emergency procedures in case of accidents or leaks.
- Permit-to-Work Systems: Formal permit-to-work systems are vital to ensure all safety checks are performed before commencing work.
Remember, safety is not just a set of rules, it’s a culture. Prioritizing safety minimizes risks and protects individuals and assets.
Q 7. Describe the different types of pipe materials and their properties.
Pipe materials are chosen based on the fluid being transported, temperature, pressure, and environmental conditions. Common materials include:
- Carbon Steel: A cost-effective option for many applications, but it’s susceptible to corrosion, especially in harsh environments. Suitable for moderate pressure and temperature applications.
- Stainless Steel: Offers superior corrosion resistance, making it ideal for applications with corrosive fluids or high temperatures. More expensive than carbon steel but provides long-term cost savings due to extended lifespan.
- Cast Iron: Relatively brittle, used mainly in low-pressure applications, like drainage systems. Not suitable for high temperatures or pressures.
- Copper: Excellent corrosion resistance, commonly used in plumbing and low-pressure applications. Its relatively low strength limits its use in high-pressure systems.
- Plastic (PVC, CPVC): Chemically resistant and lightweight, used in applications with corrosive fluids or where corrosion resistance is paramount. Less durable than metals under high pressure.
- Ductile Iron: Stronger and more ductile than cast iron, offering improved strength and resistance to shock loads. Used in applications needing higher pressure resistance compared to cast iron.
Material selection involves considering the overall system design and life-cycle costs. For example, using stainless steel for a corrosive environment may be more cost-effective in the long run due to increased lifespan despite the initial higher cost compared to a carbon steel alternative.
Q 8. How do you identify and interpret piping and instrumentation diagrams (P&IDs)?
Piping and Instrumentation Diagrams (P&IDs) are the blueprints of a process plant’s piping and instrumentation systems. They’re essential for understanding the flow of fluids, the location of equipment, and the control systems involved. Interpreting a P&ID involves understanding its symbols, line designations, and instrument tags.
Identifying Components: P&IDs use standardized symbols to represent valves, pumps, instruments, and other equipment. For instance, a circle with a filled-in triangle often represents a control valve, while a circle with an arrow might represent a flow meter. Each piece of equipment has a unique tag, allowing for easy identification and tracing throughout the diagram.
Tracing Fluid Flow: Lines represent piping, and the direction of arrows indicates the flow of fluids. Line size, material, and other critical properties are often noted. This allows engineers to understand the entire process flow, tracing how materials move from one piece of equipment to another.
Understanding Instrumentation: Instrument tags (e.g., ‘FIT-101’) identify specific instruments and their functions (e.g., ‘FIT’ might denote a flow indicator transmitter). This helps in understanding the control strategy of the system. For example, you can trace how a level sensor in a tank sends information to a controller to adjust a control valve.
Example: Imagine a P&ID showing a distillation column. You’d see lines representing the feed stream, distillate product, and bottoms product. You’d also see valves for controlling flow, temperature sensors for monitoring the process, and pressure gauges for safety.
Q 9. Explain the importance of proper pipe support and anchoring.
Proper pipe support and anchoring are crucial for the structural integrity and operational safety of a piping system. They prevent excessive stress, vibration, and potential failures which can lead to leaks, equipment damage, and even safety hazards.
Importance: Pipes, especially those carrying liquids or gases under pressure, are subject to various forces, including their own weight, thermal expansion and contraction, pressure pulsations, and fluid momentum. Without adequate support, these forces can cause sagging, misalignment, and ultimately, catastrophic failure. Think of it like a clothesline; if you don’t properly support it, the weight of the clothes will cause it to sag and potentially break.
Types of Support: Various support systems exist, including hangers (for vertical support), anchors (for preventing movement), and guides (for controlling directional movement). The choice depends on pipe size, material, pressure, temperature, and other factors. Engineers use complex calculations to determine the required support spacing and types.
Consequences of Inadequate Support: Insufficient support can cause pipe stress exceeding material yield strength, leading to cracking and leaks. Vibration can also cause fatigue failures over time. In extreme cases, failure can result in hazardous releases of dangerous substances.
Practical Application: A poorly supported pipeline in a chemical plant could lead to a leak of hazardous chemicals, causing environmental damage and posing significant safety risks. Regular inspections and maintenance are vital to ensure the integrity of pipe support systems.
Q 10. What are the common causes of pipe corrosion and how can it be prevented?
Pipe corrosion is a significant concern in many industries, leading to leaks, equipment failure, and safety hazards. It’s essentially the deterioration of a pipe’s material due to chemical or electrochemical reactions.
Common Causes:
- Internal Corrosion: This is caused by the corrosive nature of the fluid being transported. For example, acidic substances can attack the pipe material from the inside.
- External Corrosion: This occurs due to environmental factors such as soil conditions, moisture, and air exposure. For instance, buried pipes can corrode due to contact with acidic soil.
- Electrochemical Corrosion: This involves the flow of electrons between different metals in the presence of an electrolyte (like water). This is common in dissimilar metal connections.
- Microbial Corrosion: Certain microorganisms can accelerate corrosion by producing corrosive byproducts.
Prevention:
- Material Selection: Choosing corrosion-resistant materials like stainless steel or specific alloys for the pipe and its fittings is crucial.
- Coatings and Linings: Applying protective coatings (e.g., epoxy paints) or linings (e.g., plastic liners) can prevent contact between the pipe material and corrosive agents.
- Cathodic Protection: This involves using sacrificial anodes or impressed current to protect the pipe from electrochemical corrosion. It’s a common method for buried pipelines.
- Regular Inspection and Maintenance: Routine inspections to detect early signs of corrosion are essential. This includes visual inspections and more advanced techniques like ultrasonic testing.
Example: A pipeline transporting saltwater would require corrosion-resistant materials or cathodic protection to prevent rapid corrosion due to the high salinity of the water.
Q 11. Describe the process of pipe welding and inspection.
Pipe welding is a crucial process for joining pipe sections, and proper inspection ensures the integrity of the weld. The process generally involves preparing the pipe ends, welding them together, and then inspecting the weld for defects.
Welding Process:
- Preparation: This includes cleaning the pipe ends to remove any contaminants like rust, paint, or grease. The ends are then beveled to create a suitable joint.
- Welding: Various welding techniques are used, such as shielded metal arc welding (SMAW), gas metal arc welding (GMAW), or tungsten inert gas welding (TIG). The choice depends on the pipe material, size, and application requirements. Skilled welders use precise techniques to ensure a strong and uniform weld.
- Post-Weld Heat Treatment (PWHT): In some cases, PWHT is performed to relieve residual stresses in the weld and improve its toughness and ductility.
Inspection Process:
- Visual Inspection: This is the first step and involves checking the weld for obvious defects like cracks, porosity, or incomplete penetration.
- Non-Destructive Testing (NDT): More advanced techniques like radiographic testing (RT), ultrasonic testing (UT), and magnetic particle testing (MT) are used to detect internal flaws invisible to the naked eye.
- Documentation: All welding and inspection activities are meticulously documented to ensure compliance with quality standards and codes.
Importance of Inspection: Defective welds can cause leaks, ruptures, and significant safety hazards. Thorough inspection is crucial for ensuring the structural integrity and safety of the piping system.
Example: In high-pressure gas pipelines, radiographic testing is commonly used to ensure that there are no internal flaws in the welds that could compromise the pipeline’s integrity.
Q 12. How do you perform a visual inspection of a piping system?
A visual inspection of a piping system is a fundamental maintenance task that helps identify potential problems before they escalate. It involves a careful examination of the piping system to detect visible signs of damage or deterioration.
Procedure:
- Preparation: Before the inspection, make sure you have appropriate safety gear like safety glasses and gloves. Prepare a checklist to ensure all aspects of the system are covered.
- Systematic Examination: Start from a designated point and systematically examine each pipe section, valve, fitting, and support. Pay attention to all accessible areas.
- Focus Points: Look for signs of corrosion (pitting, rust, scaling), leaks (wetness, staining), damage (dents, cracks), misalignment, or loose supports. Check for proper insulation and any indication of unusual wear.
- Documentation: Take photos or videos to document any issues found. Create a detailed report noting the location, type, and severity of each problem identified. This is crucial for prioritization of repairs.
Real-World Application: A visual inspection of a chemical plant’s piping system might reveal a small leak before it becomes a major problem, preventing environmental contamination and potential safety incidents.
Example: During a visual inspection, a technician might observe rust forming on a pipe, indicating potential corrosion and the need for further investigation and repair. Similarly, a loose support could lead to pipe stress or vibration which are dangerous.
Q 13. Explain the different types of pipe insulation and its purpose.
Pipe insulation is used to reduce heat loss or gain, preventing energy waste, protecting personnel from burns, and protecting the pipe from freezing or excessive temperature fluctuations.
Types of Pipe Insulation:
- Fiberglass: A common and cost-effective option, it offers good thermal insulation properties. However, it can be brittle and requires careful handling.
- Mineral Wool: Provides excellent thermal insulation and is fire-resistant, making it suitable for high-temperature applications.
- Cellular Glass: Highly durable and resistant to moisture, making it ideal for underground or outdoor applications.
- Polyurethane Foam: Offers good thermal performance and is easy to install, commonly used for pipes carrying cold fluids. It is also relatively inexpensive.
- Calcium Silicate: High-temperature insulation, often used in high-temperature applications like steam lines. Very strong.
Purpose:
- Energy Efficiency: Insulation prevents heat loss in hot pipes or heat gain in cold pipes, reducing energy consumption and operating costs.
- Safety: Prevents personnel burns from hot pipes or frostbite from cold pipes.
- Process Control: Helps maintain consistent process temperatures, especially in sensitive processes. Maintaining consistent temperatures is key to many reactions.
- Corrosion Prevention: In some cases, insulation can help prevent condensation, which can accelerate corrosion.
Example: Steam pipes in a power plant are typically insulated with calcium silicate to prevent significant heat loss and protect personnel from burns. Cold water pipes might be insulated with polyurethane foam to prevent freezing in cold climates.
Q 14. What are the common causes of pipe vibration and how can it be mitigated?
Pipe vibration can cause fatigue failures, leaks, noise, and damage to connected equipment. It’s often caused by turbulent fluid flow, equipment imbalance, or resonance.
Common Causes:
- Turbulent Fluid Flow: High-velocity fluid flow can create vibrations in the pipe, especially in bends or valves.
- Equipment Imbalance: Unbalanced pumps, compressors, or other rotating equipment can transmit vibrations to the piping system.
- Resonance: If the frequency of vibration from a source matches the natural frequency of the pipe, resonance occurs, leading to amplified vibrations. This can lead to severe damage.
- External Sources: External vibrations, such as those from nearby machinery or traffic, can also excite pipe vibrations.
Mitigation Techniques:
- Proper Pipe Support: Adequate support and anchoring can help to damp vibrations.
- Vibration Dampers: These devices are specifically designed to absorb vibrational energy.
- Fluid Flow Modification: Adjusting flow rates or using flow straighteners can reduce turbulent flow-induced vibrations.
- Equipment Balancing: Ensuring proper balancing of rotating equipment is vital to reduce vibration transmission.
- Dynamic Analysis: Finite element analysis (FEA) can be used to predict and mitigate vibration problems before they occur.
Example: A poorly supported pipe carrying a high-velocity fluid might vibrate excessively, leading to fatigue cracking and eventual failure. Installing vibration dampers or modifying the support system would help to mitigate this problem.
Q 15. Describe the process of troubleshooting a leaking pipe joint.
Troubleshooting a leaking pipe joint starts with safety! Always isolate the section of pipe before beginning any work. Then, a systematic approach is crucial. First, we pinpoint the exact location and severity of the leak. Is it a slow drip, a steady stream, or a geyser? This helps determine the urgency and appropriate repair method.
Next, we identify the type of joint. Is it a threaded, flanged, welded, or glued joint? Each type has specific troubleshooting steps. For example, a leaking threaded joint might be addressed by tightening the connection (if accessible and safe) or applying pipe dope. A leaking flanged joint might require bolting adjustments or replacement of the gasket. Welded joints often require more extensive repair, possibly involving cutting and re-welding.
Visual inspection is key. We look for signs of corrosion, damage, or misalignment. Sometimes, a seemingly simple leak might indicate a larger underlying issue, such as pipe erosion or stress fractures. If the leak is significant or we suspect a serious problem, we might employ specialized leak detection techniques like pressure testing or dye penetrant inspection to diagnose the root cause. Once the cause is identified, the appropriate repair or replacement is undertaken, always ensuring the integrity and safety of the entire system.
Career Expert Tips:
- Ace those interviews! Prepare effectively by reviewing the Top 50 Most Common Interview Questions on ResumeGemini.
- Navigate your job search with confidence! Explore a wide range of Career Tips on ResumeGemini. Learn about common challenges and recommendations to overcome them.
- Craft the perfect resume! Master the Art of Resume Writing with ResumeGemini’s guide. Showcase your unique qualifications and achievements effectively.
- Don’t miss out on holiday savings! Build your dream resume with ResumeGemini’s ATS optimized templates.
Q 16. Explain the principles of hydraulic and pneumatic systems in piping.
Hydraulic and pneumatic systems in piping rely on different principles, but both involve fluid flow under pressure to transmit power or energy. Hydraulic systems use incompressible liquids (like oil or water) under high pressure, while pneumatic systems use compressible gases (like air or nitrogen) at lower pressures.
Hydraulic systems use pumps to pressurize the fluid, which is then directed to actuators (like hydraulic cylinders) to perform mechanical work. Think of a construction excavator – the arm movements are controlled by hydraulic cylinders powered by a hydraulic pump. In piping, this could be applied to operate valves, control flow, or move materials. The key is the relatively constant volume of the fluid; changes in pressure are mainly transferred throughout the system.
Pneumatic systems are often simpler and lighter than hydraulic systems, using compressors to supply compressed air. They are suitable for lighter-duty tasks such as operating small valves or controlling pneumatic tools. The air’s compressibility means pressure and volume changes significantly influence the system. Imagine an air-powered nail gun; the rapid pressure changes propel the nail.
Both systems require careful consideration of pressure drops across pipes, valves, and fittings. Inaccurate calculations can lead to inefficiency or even system damage. Proper pipe sizing and selection of components are critical for both.
Q 17. How do you perform preventative maintenance on valves and piping systems?
Preventative maintenance on valves and piping systems is crucial for safety, efficiency, and longevity. It involves a structured program of regular inspections, testing, and minor repairs to prevent major breakdowns. Think of it like a car’s regular maintenance schedule – small investments now prevent costly repairs later.
A robust preventative maintenance program includes:
- Regular Inspections: Visual checks for leaks, corrosion, damage, and signs of wear. This includes checking valve operation, pipe supports, and insulation.
- Lubrication: Regularly lubricating valves to ensure smooth operation and prevent seizing. The type and frequency of lubrication depend on the valve type and operating conditions.
- Valve Testing: Regularly testing valves to verify proper opening and closing, ensuring leak-tight seals. This may involve operational testing or pressure testing depending on the valve’s criticality.
- Pipe Support Checks: Inspecting pipe supports and hangers for damage or looseness. Loose supports can lead to pipe stress and eventual failure.
- Cleaning: Periodic cleaning of the pipe system to remove debris or buildup that can restrict flow or cause corrosion.
- Leak Detection: Employing methods like pressure testing or acoustic leak detection to identify and repair leaks before they become significant problems.
The frequency of these tasks depends on the system’s criticality, the operating conditions, and the materials used. A well-defined maintenance schedule, properly documented and adhered to, is essential for a reliable and safe system.
Q 18. Describe the different types of pipe hangers and supports.
Pipe hangers and supports are critical for safely and efficiently transporting fluids. They prevent sagging, vibration, and stress on the pipe, ensuring the system’s integrity. Different types are suited for various pipe sizes, materials, and operating conditions.
Common types include:
- Rigid Hangers: Provide fixed support points, often used for short spans or where minimal movement is desired. Think of a simple clamp.
- Spring Hangers: Compensate for thermal expansion and contraction. The spring allows for movement while still providing support. Essential for long pipe runs or systems experiencing temperature fluctuations.
- Constant Support Hangers: Maintain a constant support force regardless of pipe movement. They ensure consistent load distribution on the supporting structure.
- Variable Spring Hangers: Provide adjustable support force, allowing for fine-tuning the system’s load distribution.
- Trampoline Hangers: Support the pipe and dampen vibrations, especially useful for noisy or vibrating systems.
- Rod Hangers: Used for vertical pipe runs, offering direct support from the ceiling or structure above.
The selection of appropriate hangers depends on factors like pipe size, weight, material, operating temperature, expected movement, and seismic considerations. Properly designed and installed pipe supports are vital for preventing costly failures and ensuring the safety of personnel and equipment.
Q 19. What are the common causes of pipe failure and how are they investigated?
Pipe failures can have serious consequences, ranging from minor leaks to catastrophic releases. Understanding the common causes and how to investigate them is paramount for preventing future incidents.
Common causes include:
- Corrosion: Chemical or electrochemical reactions that degrade the pipe material, weakening it over time. This can be internal corrosion (from the fluid inside) or external corrosion (from the environment). External corrosion is common in underground pipelines or in areas exposed to moisture and chemicals.
- Erosion: The gradual wearing away of the pipe material due to the flow of fluid. High-velocity flows, sharp bends, or abrasive fluids can accelerate erosion.
- Stress Corrosion Cracking (SCC): A form of corrosion that occurs when a material is exposed to a corrosive environment under tensile stress. This can cause cracking and eventual failure, often unpredictable.
- Fatigue: Repeated stress cycles that weaken the pipe material over time. Vibrations, pressure fluctuations, and thermal cycling can lead to fatigue failures. These failures often exhibit a characteristic pattern of cracks.
- External Loads: Forces from the surrounding environment, such as soil pressure, traffic loads, or ground movement. Poorly designed supports can exacerbate this problem.
- Manufacturing Defects: Flaws in the pipe manufacturing process that compromise the pipe’s integrity.
Investigation involves: visual inspection, non-destructive testing (NDT) methods like ultrasonic testing, radiographic testing, or magnetic particle inspection to identify internal flaws and assess the remaining pipe wall thickness. Chemical analysis of the pipe material and the transported fluid can help determine the type and extent of corrosion. Careful analysis of the failure patterns helps determine the root cause. Once the cause is identified, corrective measures can be implemented to prevent future failures.
Q 20. Explain the importance of proper pipe cleaning and flushing procedures.
Proper pipe cleaning and flushing procedures are essential for several reasons, ensuring the system’s health, efficiency, and safety. Think of it as cleaning out your arteries – good for overall system health.
Importance includes:
- Removing Debris and Impurities: New piping systems often contain debris from the manufacturing or installation process. Existing systems can accumulate scale, rust, sediment, and other contaminants. These can restrict flow, damage equipment, and affect product quality. Cleaning removes these contaminants, preventing blockages and prolonging the system’s lifespan.
- Preventing Corrosion: Many contaminants can promote corrosion. Removing them helps mitigate corrosion risks, extending the pipe’s operational life.
- Ensuring Product Purity: In systems carrying food products, pharmaceuticals, or other sensitive materials, maintaining the system’s cleanliness is crucial for product safety and quality. Thorough cleaning prevents contamination.
- Improving System Efficiency: Clean pipes offer smoother fluid flow, minimizing pressure drops and energy consumption. A clean pipe is a more efficient pipe.
Flushing procedures vary depending on the system and the type of contaminant. They may involve using water, solvents, or specialized cleaning solutions. Careful planning and execution are essential to ensure effective cleaning without damaging the system.
Q 21. How do you interpret and use piping system specifications and drawings?
Piping system specifications and drawings are essential for understanding and maintaining the system. They provide detailed information on pipe sizes, materials, valves, fittings, and system layout. Think of them as the system’s blueprint.
Interpreting and using them involves:
- Isometrics: These drawings show the three-dimensional layout of the piping system, including pipe sizes, materials, valves, fittings, and support locations. They are crucial for physical installation and troubleshooting.
- P&IDs (Piping and Instrumentation Diagrams): These diagrams provide a schematic representation of the system, showing the flow paths, equipment, instruments, and control valves. They are essential for understanding the system’s function and control strategy.
- Specifications: These documents detail the materials, dimensions, tolerances, and testing requirements for the piping system components. They ensure that components meet the required standards and are compatible with each other.
- Bill of Materials (BOM): This lists all the components in the system, including their quantities and part numbers. It is essential for procurement and inventory management.
Understanding these documents requires familiarity with piping symbols, standards (like ASME B31), and material specifications. This knowledge is essential for maintaining, modifying, or troubleshooting the system. The combination of drawings and specifications provides a complete understanding of the system’s design, construction, and operation.
Q 22. Describe your experience with different types of valve actuators.
Valve actuators are the ‘muscles’ that move valves, allowing for automated control. I have extensive experience with several types, each suited to different applications and pressure requirements. These include:
- Pneumatic Actuators: These use compressed air to drive a piston, offering high power and relatively simple maintenance. I’ve worked extensively with them in high-pressure steam lines, where their robust nature is crucial.
- Electric Actuators: These use electric motors, often providing more precise control and easier integration with control systems. In one project, we replaced several pneumatic actuators with electric ones to improve process efficiency and reduce maintenance downtime.
- Hydraulic Actuators: These use hydraulic fluid for power, providing significant force for very large valves or high-pressure applications. I’ve used them on large-diameter water mains, requiring significant force to operate.
- Smart Actuators: These incorporate advanced features like position feedback, diagnostics, and communication capabilities. Their ability to provide real-time data is invaluable for predictive maintenance, something I’ve utilized in several projects to minimize unexpected shutdowns.
My experience spans troubleshooting malfunctions across all these types, from diagnosing leaks in pneumatic systems to resolving electrical faults in motor-driven actuators. Understanding the nuances of each type is key to efficient and safe operation.
Q 23. Explain the process of isolating a section of piping for maintenance.
Isolating a section of piping for maintenance involves a methodical process to ensure worker safety and prevent system disruption. It’s like turning off a section of a water pipe before making repairs – you need to carefully block the flow.
- Identify the Section: Clearly define the area requiring maintenance, noting all connected lines and equipment.
- Lockout/Tagout (LOTO): This crucial step involves isolating the power source to the relevant equipment, applying locks and tags to prevent accidental activation. I always follow stringent LOTO procedures, ensuring compliance with company and industry safety regulations.
- Close Valves: Systematically close all valves upstream and downstream of the target section. I always visually check the valve position and perform a pressure test to ensure complete isolation. This ensures no pressure will be present when maintenance is carried out.
- Bleed Down Pressure: Once valves are closed, carefully vent or bleed down any remaining pressure within the isolated section. This is crucial to prevent unexpected pressure surges during maintenance.
- Verify Isolation: Double-check that the section is completely isolated and depressurized using appropriate pressure gauges. Safety is paramount, and I never proceed without confirming complete isolation.
- Complete Maintenance: Conduct the required maintenance work once the section is safely isolated and depressurized.
- Restore System: Reverse the process, carefully opening valves, monitoring pressures, and removing LOTO devices once the maintenance is complete.
Following this procedure ensures a safe and controlled maintenance process, preventing accidents and costly downtime.
Q 24. What are the common tools and equipment used in valve and piping maintenance?
The tools and equipment used in valve and piping maintenance vary depending on the specific task, but some common essentials include:
- Hand Tools: Wrenches (various sizes), screwdrivers, pliers, hammers, pipe cutters, pipe wrenches.
- Power Tools: Electric or pneumatic drills, impact wrenches, grinders, welding equipment (for certain repairs).
- Testing Equipment: Pressure gauges, leak detectors, ultrasonic testing equipment (for non-destructive testing), thermometers.
- Lifting Equipment: Chain hoists, slings, and other lifting devices (for heavy components).
- Safety Equipment: Hard hats, safety glasses, gloves, respirators, fall protection equipment.
- Specialized Tools: Valve packing tools, torque wrenches (for precise valve tightening), alignment tools (for flange connections).
Properly maintained and calibrated equipment is essential for both safety and the quality of repairs. I always ensure our tools are in good working order before commencing any maintenance task.
Q 25. How do you ensure compliance with relevant safety standards and regulations?
Compliance with safety standards and regulations is paramount in valve and piping maintenance. I ensure this through a multi-faceted approach:
- Knowledge of Regulations: I stay up-to-date on relevant codes and standards, such as ASME, API, and OSHA regulations, depending on the specific industry and location.
- Risk Assessments: Before any maintenance task, I participate in comprehensive risk assessments to identify potential hazards and develop appropriate control measures. This includes considering the type of fluid being handled, pressure levels, and potential environmental impacts.
- Permit-to-Work Systems: I strictly adhere to permit-to-work procedures, ensuring that all necessary approvals are obtained before commencing work. This guarantees that all safety precautions have been implemented.
- Training and Certification: I maintain my professional certifications and attend regular training sessions on safety procedures and best practices. Continuing education ensures I am proficient in the latest safety guidelines.
- Documentation: All maintenance activities are thoroughly documented, including safety checks, inspections, and repairs. This helps track compliance and identify areas for improvement.
Safety is not just a set of rules; it’s a fundamental principle integrated into every aspect of my work.
Q 26. Describe your experience with different types of pipe expansion joints.
Pipe expansion joints are crucial for accommodating thermal expansion and contraction in piping systems. My experience encompasses various types:
- U-shaped Expansion Joints: Simple and cost-effective, they are suitable for low-pressure applications and allow for limited movement. I’ve utilized these in HVAC systems where expansion is moderate.
- Bellows Expansion Joints: These provide greater flexibility and can handle larger temperature variations and higher pressures. I’ve used these extensively in power plants handling high-temperature steam lines.
- Universal Expansion Joints: Highly flexible, they are able to accommodate movement in multiple directions. These are often necessary where piping systems undergo complex movements due to thermal expansion or vibration. This type of expansion joint was necessary in a recent refinery project handling fluctuating temperatures.
- Hinged Expansion Joints: These allow for angular movement. They’re helpful in applications where pipes require movement in a specific direction.
Selecting the right expansion joint depends on the specific application parameters, including pressure, temperature, and the amount of expected movement. Improper selection can lead to leaks, system failure, and safety hazards.
Q 27. Explain how you would handle an emergency situation involving a piping system leak.
Handling a piping system leak is a critical situation requiring immediate and decisive action. My approach involves:
- Isolate the Leak: Immediately isolate the affected section of the piping system by closing the appropriate valves upstream and downstream of the leak. This limits the extent of the damage and prevents further fluid loss.
- Evacuate the Area: If the leak involves hazardous materials, immediately evacuate personnel from the area. This protects workers from potential injury from spraying fluids or toxic fumes.
- Emergency Shutdown: If necessary, initiate the emergency shutdown procedures for the entire system to prevent escalation of the problem.
- Contain the Spill: Utilize appropriate containment measures, such as spill kits and absorbent materials, to control the spread of spilled fluids. This is particularly crucial if the fluid is hazardous or environmentally damaging.
- Assess the Damage: Once the leak is contained, conduct a thorough assessment of the damage to determine the extent of repairs required.
- Contact Emergency Services: If necessary, contact emergency services for assistance in managing the situation, especially if dealing with hazardous materials.
- Repair/Replacement: Once safe, initiate the necessary repairs or replacement of the damaged section of the pipe. This will often involve specialized tools and techniques.
Effective emergency response planning and regular training are crucial for minimizing damage and ensuring worker safety in such situations.
Q 28. Describe your experience with computerized maintenance management systems (CMMS).
Computerized Maintenance Management Systems (CMMS) are essential for efficient and proactive maintenance. My experience with CMMS includes using various platforms to manage work orders, track maintenance history, schedule inspections, manage inventory, and generate reports. I’ve used systems like (mention a specific CMMS here – e.g., IBM Maximo, SAP PM).
These systems streamline maintenance processes. For example, I can use a CMMS to schedule preventative maintenance based on equipment usage hours, enabling predictive maintenance and preventing catastrophic failures. The ability to generate reports on maintenance costs, downtime, and equipment performance helps optimize maintenance strategies and demonstrate return on investment.
I’m proficient in using CMMS to track work orders, from initial request to completion and closure, ensuring all necessary documentation is stored digitally for easy access and auditing. My experience includes configuring and customizing CMMS to align with our specific maintenance needs and reporting requirements.
Key Topics to Learn for Valve and Piping System Maintenance Interview
- Valve Types and Functionality: Understanding different valve types (gate, globe, ball, check, etc.), their applications, and operating principles is crucial. Be prepared to discuss their strengths, weaknesses, and maintenance requirements.
- Piping System Design and Materials: Familiarize yourself with common piping materials (steel, PVC, etc.), their properties, and how they impact system design and maintenance. Understanding pressure ratings, temperature limitations, and corrosion resistance is vital.
- Leak Detection and Repair: Mastering leak detection techniques (visual inspection, pressure testing, acoustic detection) and repair methods (welding, brazing, patching) is essential for demonstrating practical skills.
- Preventive Maintenance (PM) Schedules and Procedures: Discuss the importance of developing and adhering to preventative maintenance schedules. Be prepared to explain how to plan and execute PM activities effectively and efficiently.
- Troubleshooting and Problem Solving: Develop your ability to diagnose and resolve common piping and valve system issues. Practice explaining your systematic approach to troubleshooting, including data analysis and decision-making.
- Safety Procedures and Regulations: Demonstrate a strong understanding of relevant safety regulations (OSHA, etc.) and best practices for working with high-pressure systems and hazardous materials.
- Instrumentation and Control Systems: Understanding the role of pressure gauges, flow meters, and control valves in monitoring and regulating the piping system is important. Be prepared to discuss their operation and maintenance.
- Documentation and Record Keeping: Explain the significance of accurate and complete documentation of maintenance activities, including inspections, repairs, and PM schedules.
Next Steps
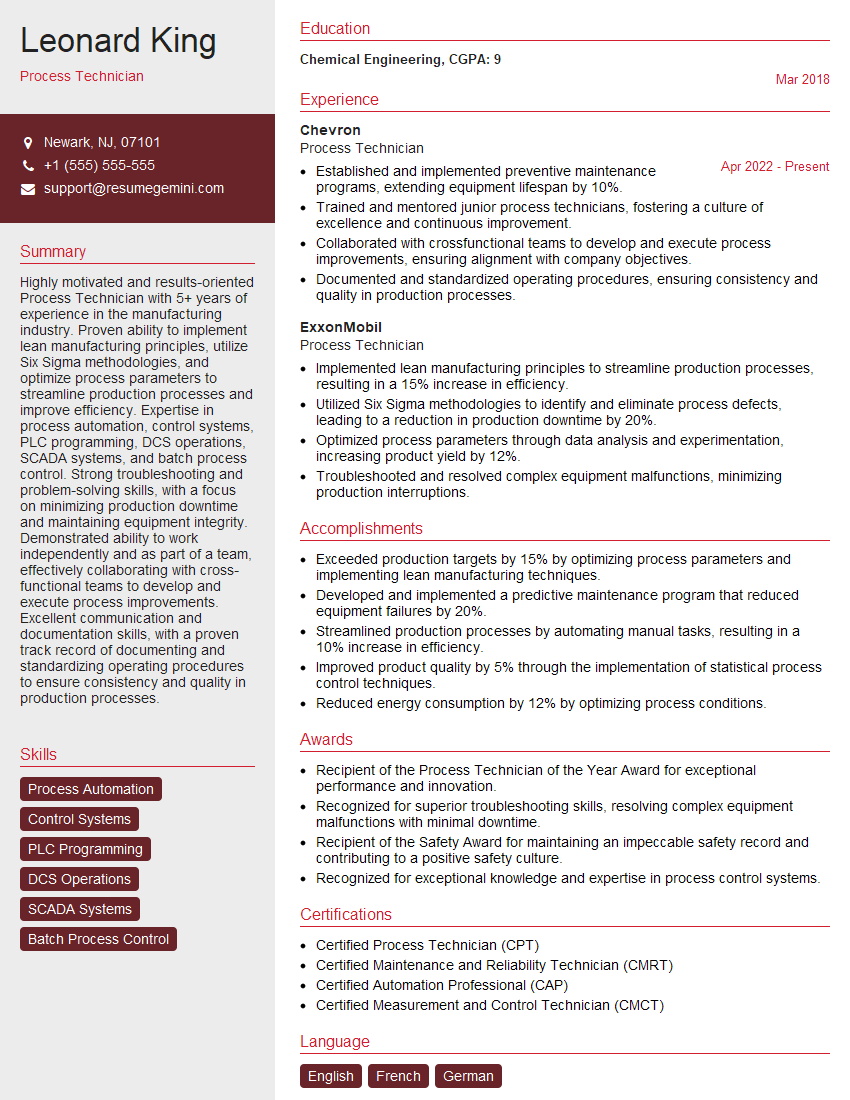
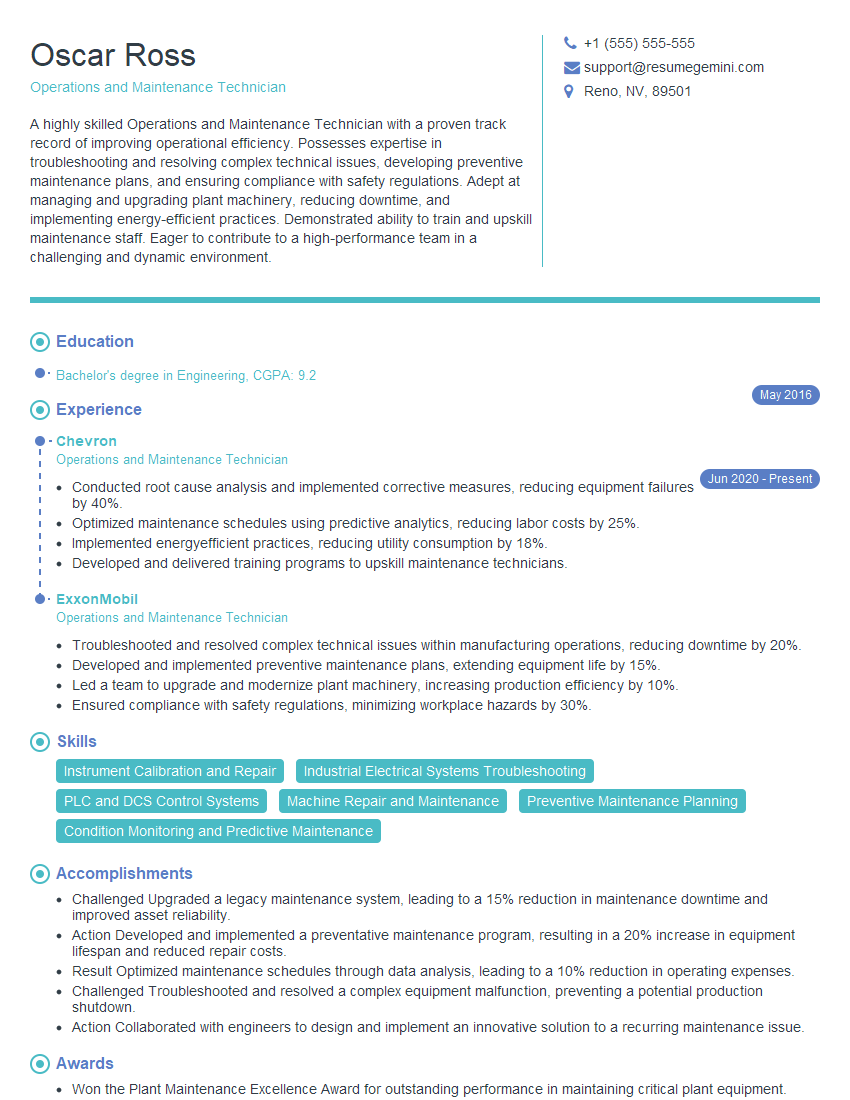
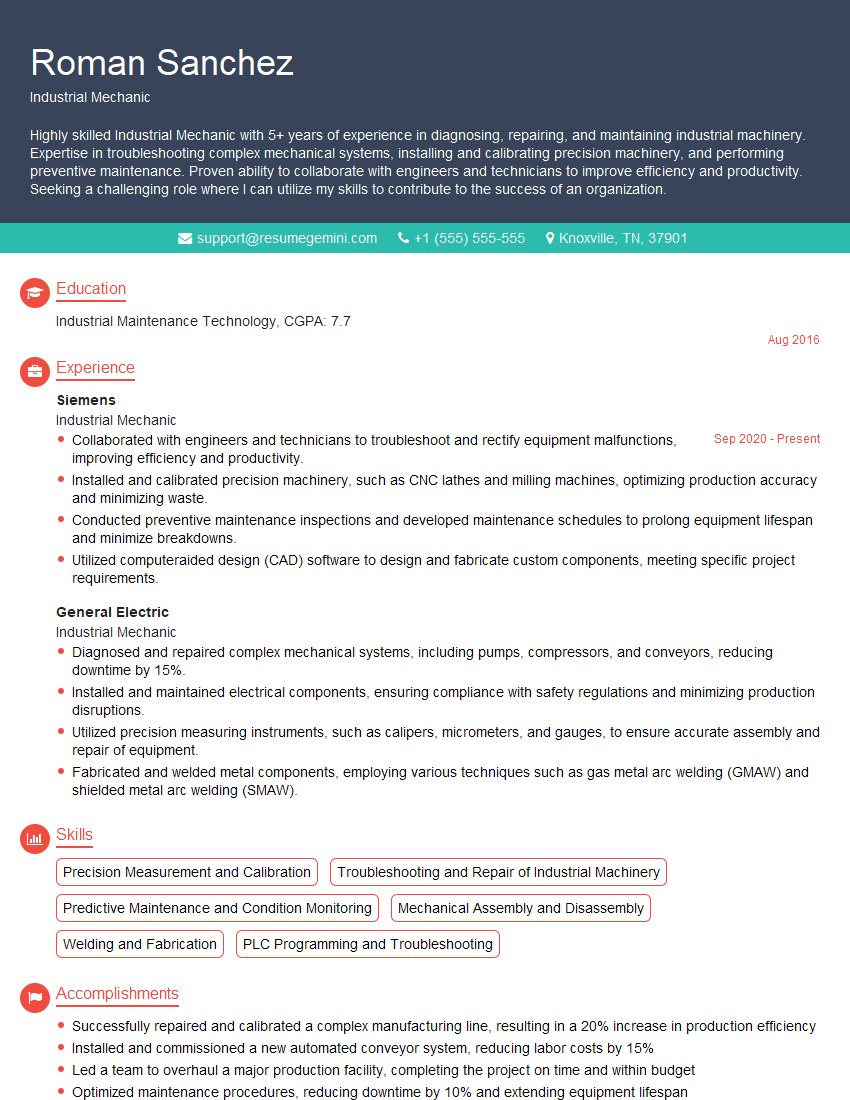
Mastering Valve and Piping System Maintenance is key to a successful and rewarding career in this essential field. It opens doors to advanced roles, increased responsibility, and higher earning potential. To maximize your job prospects, focus on creating an ATS-friendly resume that highlights your skills and experience effectively. ResumeGemini is a trusted resource that can help you build a professional, impactful resume that gets noticed by recruiters. We provide examples of resumes tailored to Valve and Piping System Maintenance to guide you in creating the best possible presentation of your qualifications.
Explore more articles
Users Rating of Our Blogs
Share Your Experience
We value your feedback! Please rate our content and share your thoughts (optional).
What Readers Say About Our Blog
Hi, I represent an SEO company that specialises in getting you AI citations and higher rankings on Google. I’d like to offer you a 100% free SEO audit for your website. Would you be interested?
Dear Sir/Madam,
Do you want to become a vendor/supplier/service provider of Delta Air Lines, Inc.? We are looking for a reliable, innovative and fair partner for 2025/2026 series tender projects, tasks and contracts. Kindly indicate your interest by requesting a pre-qualification questionnaire. With this information, we will analyze whether you meet the minimum requirements to collaborate with us.
Best regards,
Carey Richardson
V.P. – Corporate Audit and Enterprise Risk Management
Delta Air Lines Inc
Group Procurement & Contracts Center
1030 Delta Boulevard,
Atlanta, GA 30354-1989
United States
+1(470) 982-2456
